Summer Fave: Grilled Lamb Shoulder Chops

Grilled lamb shoulder chops with sweet and spicy corn and tomato salad.

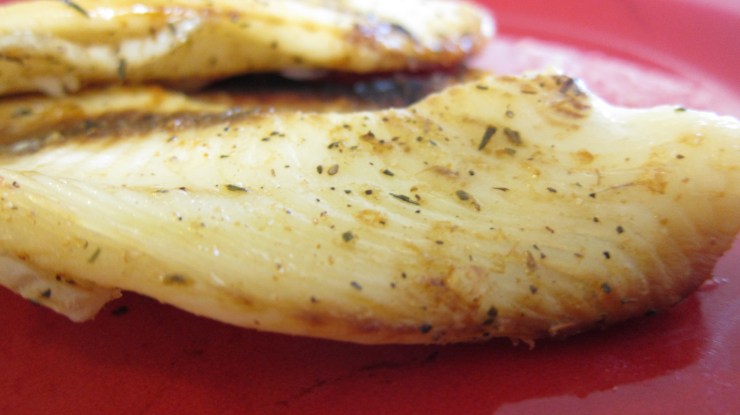
I may have found a summer favorite. Inspired by Ina Garten’s recipe (minus the yogurt mint sauce), I decided to experiment with a couple of lamb shoulder chops a few weeks ago. The amazing result has made me repeat this recipe a couple of times already. The marinade’s combination of rosemary, oregano, garlic, lemon juice, olive oil, and red wine work so well together in creating such a succulent grilled lamb.


I followed the recipe’s ingredient list but adjusted a few things:

  • Instead of using rack of lamb, I used lamb shoulder chops
  • Lemon juice from 1 lemon
  • 1 tablespoon of minced garlic
  • 3 tablespoon of olive oil
  • 3 tablespoon of red wine
  • 2 sprigs of rosemary (fresh from the garden, yay!)
  • A dash of dried oregano

Steps:

  • Mix all of the above in a big zip lock bag. Please make sure that all ingredients coat the lamb nicely. Leave the bag in the fridge and let the chops marinate for half a day or overnight.
  • Fire up the grill and, as Ina Garten’s recipe suggests, add salt and pepper on the lamb. Then let them sizzle on a medium-high heat grill for 5 minutes on each side.
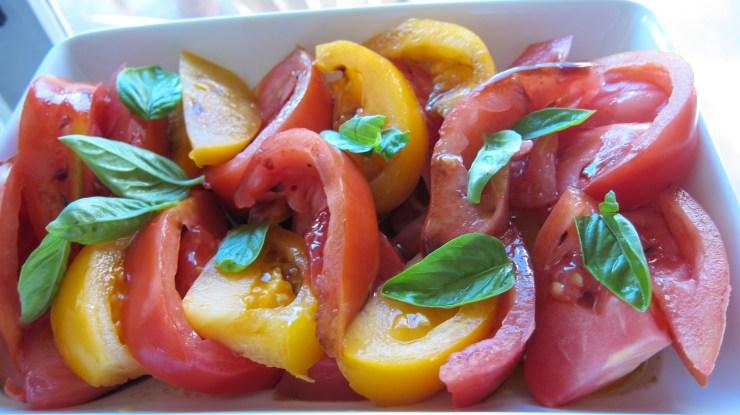
  • Serve with my Sweet and Spicy Corn Salad and Tomato Salad. Hmm…insanely good!

Easy Summer Menu: Sweet and Spicy Corn Salad

A few weeks ago, Jeff prepared a corn dish to serve alongside our steak and tomato salad. He basically just cooked thawed frozen corn kernels in a little bit of butter and cayenne pepper powder. I couldn’t believe how that simple process produced such a delicious dish. I was hooked and inspired to create a salad out of it.

This colorful salad just screams summer, don’t you think? 🙂 It’s a little sweet and spicy, lemony, crunchy, and mmm…it’s got that wonderful cilantro’s fragrance!

Here’s what we will need for my version:

  • A bag of thawed frozen corn or peeled fresh corn kernels from four to six ears
  • One tablespoon of unsalted butter
  • One red bell pepper (cored and chopped)
  • Cayenne pepper powder (I also added three fresh cayenne peppers. But PLEASE adjust to your piquant-tolerance level)
  • Salt
  • Black Pepper
  • A handful of chopped cilantro (if you’re not a cilantro fan, go with parsley).
  • Lemon juice from 1 lemon

Steps:

  • Heat up a medium pan
  • Melt the butter
  • Add the chopped bell pepper and corn kernels. Cover with a lid and let cook for 5 minutes (until the butter and water that comes out of the corn and bell pepper start to bubble).
  • Remove from the heat
  • Add salt, pepper, a dash of cayenne powder, cilantro, and drizzle with the lemon juice. Mix and serve. You could also chill it in the fridge and serve it cold.
This time I served the corn salad with grilled lamb shoulder and tomato salad. Delicious!

Easy Summer Menu: Colorful Tomato Salad

I like tomatoes. They are so colorful, plump, and cheerful. When I was little, mom used to make a refreshing treat out of tomatoes. She’d cut them up, mixed with crushed ice, and sprinkled sugar on top of them. Delicious!

I have two tomato plants growing and I can’t wait until they start bearing fruits! Since I can’t have my own home-grown tomatoes yet, I got these wonderful and colorful ones from the market the other day and turned them into a delicious summer salad!

I just sliced the tomatoes in big wedges, sprinkled them with a little salt and black pepper, drizzled an equal amount of olive oil and balsamic vinegar (you could also use red wine vinegar instead of balsamic if you want), and added basil leaves I picked from my container garden. I covered the plate and chilled it for a bit before serving. Easy and yummy!

I served this salad with the steak that my guy grilled for us and the sweet and spicy corn salad (next entry) that he also made. Mmm…another fabulous dinner!

Easy Summer Menu: Baked Martabak (Martabak Panggang)

Summer is almost here! Time to slow down and enjoy the gorgeous days. As we ease into the warmest season of the year, I plan to stay cool and light in both what I wear and what I cook/eat.  So for food, I am compiling recipes that might go well with my idea of summer menu: simple, light, and delicious. One dish that I thought about immediately was martabak, one of my favorite street food in Indonesia.

Baked Martabak

Recently, inspired by a recipe I found online, I baked martabak instead of following the street vendor’s traditional way: frying (less oil mess, less stress). They came out crispy and delicious.

Here’s my version:

(Make 8-10 martabak)

INGREDIENTS:

  • 3 eggs
  • 1 pound of sirloin ground beef
  • 1 teaspoon of minced garlic
  • 3 bunches of scallions (chopped)
  • 1 egg for eggwash
  • ½ cup of vegetable oil
  • 1 teaspoon of curry powder
  • 1 tablespoon of cayenne pepper powder
  • Salt

STEPS

Making the mixture:

  • Preheat the oven to 350 degrees Fahrenheit.
  • Heat up a tablespoon of vegetable oil in a medium pan (over medium heat)
  • Add garlic and let it sizzle for two minutes.
  • Add curry powder, cayenne pepper powder, and salt. Mix together with the garlic.
  • Add ground beef and mix it with the spices.
  • Dump the juice from the meat and let the beef continue to brown.
  • Taste and add spices if necessary.
  • Add the chopped scallions, mix them up with the beef, and set the pan aside.

Folding the martabak:

  • Pick up 3 fillo dough sheets for each piece of martabak, brush with the rest of vegetable oil, scoop the beef mixture, and add to the middle of the sheets. Repeat.
  • Place the folded martabak on a greased oven tray, brush the top with eggwash, and place into the oven for 20 minutes until they are golden brown.
  • Let them rest for a couple of minutes, cut in the middle, and serve. (I made mine a bit bigger and then I cut them before serving).
  • Serve with Thai peppers (optional).

    Hot out of the oven

More to come later!

Container Gardening and My Nemesis

Like many people, I get excited over the arrival of spring. I relish the longer and warmer days and I plan to be outside as much as I can. Also like many others, I plant in the spring time. Due to space limitation I stick with container gardening, which I have been doing for a few years now. I started with growing flowers and chili peppers in containers outside of my apartment windows in Chicago. Now that we live in an apartment with a patio that opens up to a grassy area, I have a little bit of space for more plants.  This year I focus on herbs and vegetables that I use a lot in my cooking. So far I have:

parsley and rosemary,

tomato,

Cayenne peppers, sweet basil, Thai and Serano peppers, and another tomato.

I also have jasmine, impatiens, lavender, citronella mosquito plant, mums, and a couple of other flowers.

The nemesis eating my tomato

Of course like many of those who garden, I also have a nemesis. I caught him eating my tomato one day. A few days later, my sweet upstairs neighbor confessed that she’s been feeding my nemesis recently. She thinks that feeding the chipmunk will make it full and stop eating my young tomatoes.  But I am thinking that it might invite more chipmunks to party on her patio.

Meanwhile, I am sprinkling cayenne pepper powder around my tomato plants. A tip I found online somewhere. Let’s see if it works. So far so good though.

PS: If you a name suggestion for my nemesis, I am all ears.

Crispy Baked Tilapia

(Author revised on April 12, 2013)

I like a variety of white fish like snapper, halibut, and tilapia. In my opinion, tilapia happens to have a very mild taste suitable for Indonesian cooking, which normally uses a lot of spices. For readers in Indonesia, I imagine dori, gurame, or red snapper fillets would work great for this recipe.

So here’s what we’re going to need (feel free to adjust the spices to fit your preference):

  • 4 Tilapia fillets (medium size)
  • 1 teaspoon of salt
  • ½ teaspoon of ginger powder
  • 1 teaspoon of black pepper powder
  • 1 teaspoon of cayenne pepper powder (substitute with chili or paprika powder if you prefer it to be milder)
  • A pinch of dried oregano (optional)
  • 1 tablespoon of white vinegar (optional)
  • 1 lemon

Steps:

  • Spray or grease the oven tray with a little bit of olive oil or canola oil.
  • (Optional) Mix the white vinegar with a little bit of water in a small bowl and give the fillets a quick rinse. And then rinse with water. (I do it to lessen the fishy aroma a little bit.)
  • Place the fish on an oven tray.
  • In a separate bowl, mix the salt, ginger, black pepper, cayenne powder.
  • Heat the oven to 425 degree Fahrenheit.
  • Sprinkle and coat the fish with the mixed spices. Let the fillets sit for about 10 minutes.
  • Cook for 12-13 minutes.  Do a longer bake time if the fillets are bigger/thicker.
  • For more crisp, turn the oven broiler (after baking) for about 3-4  minutes. Leave the oven door slightly (like 2 inches) open to avoid charring.
  • When it’s done, the fish will have that light golden color and crispy texture on the outside but fluffy in the inside.
  • Serve with lemon wedges on the side.

Serve 2-3 people

Tempeh with Chillies and Vegetables – An Easy and Tasty No-Meat Dinner

Once in a while, Jeff and I do a no-meat dinner at home. Meatless menu isn’t really anything new to Indonesians. Many depend on either plant-based like tempeh or on a variety of seafood anyway as their sources of protein.

I think I’ve mentioned in my other recipe that tempeh is one of staple food in Indonesia. This soy-based patty shows up a lot at Indonesians’ dinning tables along with its partner: the fried white tofu (sadly, I can’t seem to find the same kind of tofu here in the US). Usually, tempeh is sliced, seasoned with a little bit of salt, fried until its light golden, and served with chillies, some vegetables, and rice. I also like it cooked with chillies. We call it sambal tempeh and it’s got both spiciness and sweetness to it. Yum!

Here’s my version. I like to serve this dish with my spinach and corn vegetable soup, crispy baked tilapia , and rice.

  • 2 tempeh patties (usually sold at the grocery’s organic section)
  • 1 bag of frozen peas and carrots (small bag)
  • 2 tablespoon of minced garlic
  • 6 hot finger peppers (chopped)
  • 4 Thai peppers (chopped)
  • 3 tablespoon of low sodium soy sauce
  • 2 tablespoon of sweet soy sauce (substitute: mix two tablespoon of soy sauce and one tablespoon of honey)
  • ½ onion (chopped)
  • Black pepper powder to taste
  • 2 tablespoon of canola or vegetable oil

Steps:

  • With clean hands, break the tempeh patties into smaller parts.
  • Heat up the oil in a pan (medium heat)
  • Add the garlic and onion into the pan and let them sizzle for a minute until they turn yellow.
  • Add the tempeh and mix it up with the garlic and onions. Let it cook for a while until it turns light brown.
  • Add the peas, carrots, chopped peppers, both soy sauces, and black pepper.
  • Stir and mix it all up.
  • Cover with a lid and let them cook for another 10 minutes.
  • Serve with rice

Serve 4-6 people

Mini Mascaporne, Hazelnut, and Honey Cup Loaf Cakes

A good and descriptive storytelling could really captivate an audience attention and inspire her to try something new. My friend Leena and I would engage in a food talk once in a while. We’d discuss…well…good food, restaurants and their cuisines, and recipes. Recently, she talked about her favorite cupcakes in such great details that images of cupcakes started to float around in my mind. For days! And I wasn’t even a cupcake person. She’s really good, that Leena :). It was a sign for me to bake again.

So I studied a few recipes and combined the two that I liked the most. I wanted something that had a great combination and wasn’t too sweet. Inspired by Giada De Laurentiis’ Spiced Apple Walnut Cake (that she turned into a cupcake recipe in her Weeknights with Giada book) and Mascaporne Mini Cupcakes, I present my latest baked goods: Mini Mascaporne, Hazelnut, and Honey Cup Loaf Cake sans frosting.

Jeff and I simply love the firm and nutty texture of the cake. The aroma and taste of honey and hazelnut are just delightful. These little cakes make a perfect pair with morning coffee. Watch them disappear quickly from the tray 🙂

Here’s the ingredients list:

  • 8 ounces of Mascaporne cheese (1 cup)
  • 3 eggs
  • ¾ cup of vegetable oil
  • ¾ cup of light brown sugar
  • ½ cup of honey
  • 1 tablespoon of pure vanilla extract
  • 3 cups of all purpose flour
  • 1 ½ teaspoon of baking powder
  • 1 ½ teaspoon of baking soda
  • ½ teaspoon of fine sea salt
  • 1 cup of chopped hazelnut (or Filbert)

Steps:

  • Preheat oven to 350 degrees F.
  • Line two 24-mini muffin tray with paper baking cups.
  • In a large bowl and using a hand mixer, mix Mascaporne, eggs, and vegetable oil until they become one creamy mixture. Add brown sugar, honey, and vanilla extract. Mix all wet ingredients well.
  • In another large bowl, combine the dry ingredients: flour, baking powder, baking soda, and sea salt.
  • Mix the combined dry ingredients with the wet mixture. Fold the chopped hazelnut.
  • Using a spoon, scoop the batter to fill the mini cups well below the rim
  • Bake for 15  minutes. The cakes will have this beautiful light golden shade. (To make sure the cakes are done, I insert a skewer into the cake. When it comes out clean, I know the cakes are ready to cool down.)
  • Let the cupcakes cool down for 20 minutes before serving.

Make 48 mini cup loaf cakes

Roast Chicken with Turmeric and Spices

The quest to have a collection of easy and flavorful roast chicken recipes continues.

I definitely have been on a roast chicken kick lately. I love the crispy exterior, but tender interior, and flavorful roast chicken. Now, the goal is to have a few different versions. So I play with the seasonings each time I roast. Last month I did a dry-rub with rosemary and thyme. This time, I’ll do a wet-rub with turmeric and other spices!

My recipe below is inspired by a traditional Javanese yellow fried chicken or ayam goreng kuning (the yellow coloring comes from turmeric). When you travel to Java Island, this is the kind of fried chicken you’d find at local restaurants. The chicken tend to be much smaller, so flavorful and aromatic, crispy on the outside but so tender in the inside. It is usually served with white rice, some green vegetables, and chilies. I am a huge fan!

For my version though, I opt out of frying and choose to roast instead. I find roasting to be a lot “friendlier” than frying on many levels. With roasting, I get to just place the chicken in the oven, set the timer, and leave it alone for a while. Also, I would not have to deal with the oil splattering onto my skin, my clothes, and my whole kitchen. Less mess, less stress. Most importantly, roasting does the job. The chicken comes out with that beautiful golden color and the crispy and tender texture that I expect.

So here’s how we do it. We will need:

  • A whole chicken (cut up into 12 pieces—I like smaller cuts)
  • 5 shallots (chopped)
  • 1 tablespoon of minced garlic
  • 1 tablespoon of coriander powder
  • 1 teaspoon of turmeric powder
  • 1 teaspoon of ginger powder
  • Salt
  • Black pepper
  • An inch of galangal root (smashed)
  • One lemongrass (the white part only, smashed)
  • You may substitute the galangal root and lemongrass with lemon zest and juice from two lemons.

Steps:

  • In a large and deep cooking pan, boil 3 cups of water, and then turn the heat off.
  • Add all of the spices into the water and mix it well. Let it cool down. Taste and add salt if necessary.
  • Place the chicken into the spice mixture.
  • Once the liquid is cool enough, using your clean hands, rub the chicken with the spice mixture. Make sure that the chicken is well coated. (Would be good if the chicken is submerged.)
  • Cover with a lid and store in the fridge overnight or at least half a day.

Roasting:

  • Preheat oven to 400 degrees F.
  • Place chicken on an oven rack set on top of a tray (to collect the juices)
  • Cook for 40-45 minutes (until chicken temperature reaches 165 degrees F).
  • For golden color on the outer part, I turn on the broiler and let the chicken brown for 2-5 minutes. To avoid charring, leave the oven door slightly ajar (a couple of inches) and please don’t wander off too far 🙂
  • Serve with rice

Serve 4 generously

Oxtail Soup with Vegetables

April’s last days were quite cold. The wind and low temperature were pretty brutal compared to the 80-degree weather we had in March!  This spice-filled Indonesian oxtail soup loaded with vegetables was definitely a great pick-me-up meal on such chilly days.

My secret to having a great oxtail soup is to slow-cook it the night before serving. On the next day, the vegetables and broth would become so much more flavorful and the tender meat would just fall off the bones so easily. The comforting effect makes the soup worth the time and effort.

Here’s my version:

  • 6  cuts of oxtail (get different sizes: large, medium, and small)
  • 6 carrots (peeled and slice into thin cuts)
  • ½ of cauliflower (cut into small florets)
  • A handful of green beans (trim the end parts and then cut into shorter lengths)
  • 1 tablespoon of minced garlic
  • 1 sweet onion (chopped)
  • ½ teaspoon of nutmeg
  • Salt
  • Black pepper
  • 3 Thai peppers (chopped)

Steps:

  • Place the oxtails in a large cooking pot.
  • Add water enough to cover the oxtails.
  • Bring to boil over medium heat and then reduce the heat to simmer. Cover the pot with a lid.
  • Add the garlic, onion, nutmeg, salt, black pepper, and Thai peppers. Let simmer for 2 ½ hours.
  • Check frequently to add water. Make sure that the oxtails are always submerged.
  • After 2 ½ hours, add the chopped vegetables and cook for another 10-15 minutes.
  • Taste and add salt or pepper if necessary.
  • Cover the pot and let it rest and cool off.
  • Keep in the fridge until it is time to serve.
  • Heat up by bringing the soup to a boil. Serve over rice.

Serves 4-6

What’s your comfort one-pot meal?