Braised and Broiled Chicken Thighs

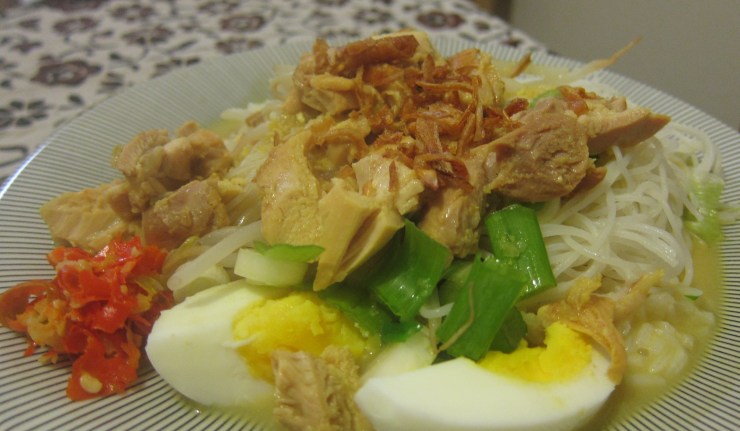
As a big-flavor food enthusiast, I see chicken as a great “blank canvas” in my cooking. The meat has great potential for many delicious dishes. With the right blend of spices and a little patience anyone can create their own far-from-boring signature chicken dish. For me, braised and broiled chicken has been an all-time favorite and specialty.

Inspired by a version (out of many) of traditional Javanese grilled chicken, I learned to cook this meal by trying on different recipes years ago. I tweaked the technique and ingredients many times to get to my own version. We evolved with time, the recipe and I. Now that I have reached my satisfactory level with this dish I feel more confident in sharing the recipe with others. 

Chicken thighs with their succulence and tender texture work best for this particular recipe. The meat doesn’t turn dry even after being cooked twice. In this recipe I braise the chicken to tenderize the meat and infuse it with flavors of my choosing. Then I broil the braised meat to get that crispy golden brown effect on the chicken’s exterior. (During the warmer months I’d brown the braised chicken on a grill outside.)

Here are the must-haves and the steps to cook the chicken:

  • 4-6 bone-in and skin-on chicken thighs. (Worry not about the fat. A lot of it will be cooked out of the meat.)
For the lemon-like aroma, smash:
  • 1 inch of galangal
  • 1 lemongrass
  • 2 kaffir lime leaves (optional)

For the flavor, mix and puree in a food processor:

  • 1 inch of ginger
  • 1 tablespoon of minced garlic
  • 4-5 shallots
  • 5-6 candlenuts
  • 1 teaspoon of coriander powder
  • ½ teaspoon of turmeric powder
  • ½ teaspoon of black pepper powder
  • 1 tablespoon of cayenne pepper powder
  • Salt (be generous)

Heat up a tablespoon of canola oil in a large pot (over medium heat). Brown the blended spices along with the galangal and the lemongrass. Add the chicken and two or three cups of water (until the chicken is almost, not completely, covered by the liquid). Stir and mix well. Throw in the kaffir lemon leaves. Cover with a lid and let it cook for an hour to an hour and a half until the meat gets tender. Taste before broiling. Add more salt if necessary. (Leaving the chicken in its braising liquid overnight, and broil the next day, would amplify the taste.)

Final step:

Set oven to broil. Place the chicken thighs on an oven rack set over a tray (so that any leftover juice has a place to go). Broil each side for 4-5 minutes until the color turn to golden brown. Be careful, it’s super hot!

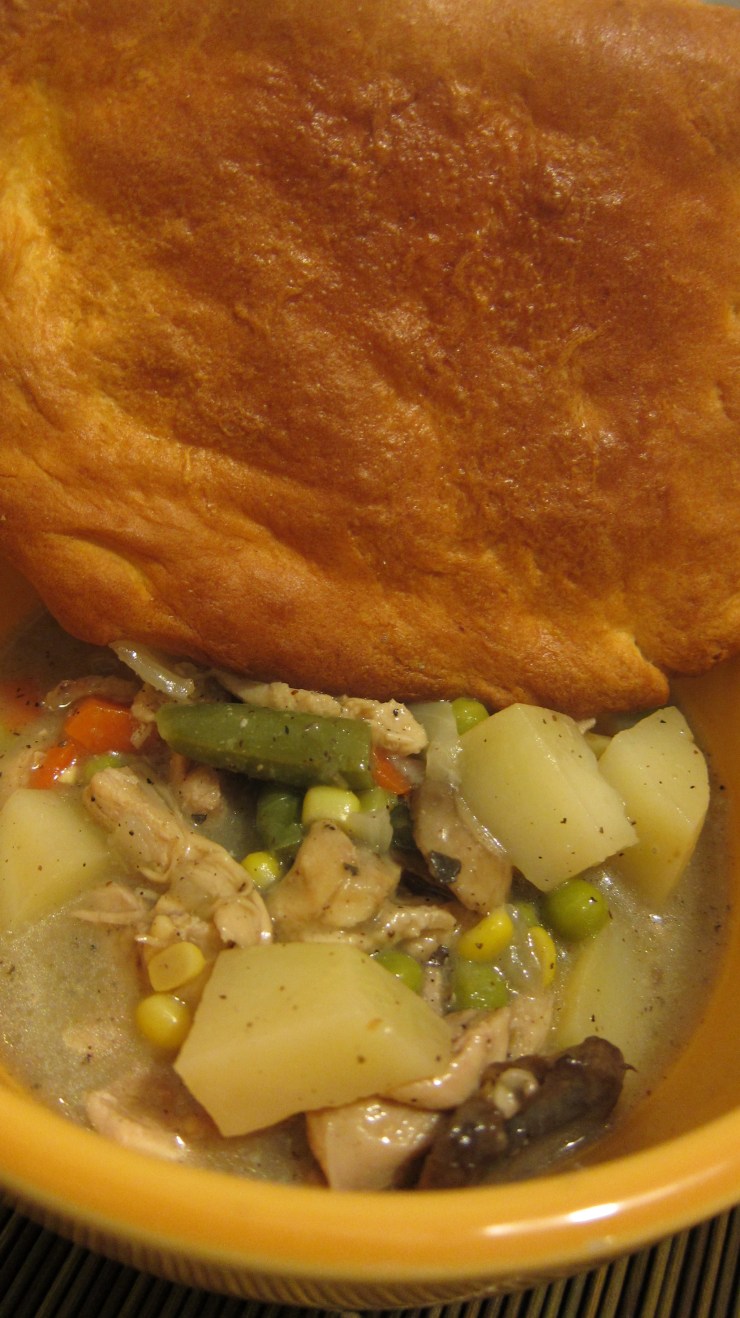
Great with steamed white rice, chilies, and a vegetable soup side dish (coming up on the blog soon).

Serve two generously

Road Trip: Arizona

Grand Canyon was exactly how I had pictured it in my mind: majestic and breathtaking. The bright sun illuminated the deep and steep canyon walls as far as the eyes could see. Some of the canyons looked like gigantic Buddhist stupas of Borobudur in Java—only these ones were carved by nature. The Colorado River, the “sculptor”, seemed endless snaking through the deep canyon. 

Sedona Bound

After the Grand Canyon, we continued the journey to Sedona. We drove through the San Francisco Peaks where Arizona’s highest, Humphrey’s Peak, stood. The landscape seemed to change dramatically as we drove. We left the deep canyons and headed toward the snow covered mountains.

We stopped in Flagstaff for a tasty Thai lunch on N. San Francisco Street. Thanks to the gods of technology finding local restaurants based on reviews get easier than ever. The possibility truly gives better options to our places-to-eat list during road trips. (I tried to use at least two sources. For this trip I used TripAdvisor.com and Yelp.com)

The scenery changed once again as we approached Sedona. Towering red sandstone greeted us along the curvy road. This tourist town had a marvelous backdrop of the red mountains. We strolled around the town’s galleries and shop filled downtown. The weather became warmer with the bright sunlight.

View from our pink jeep
We went on a
Pink Jeep Tour to Sedona’s backcountry the next day. The two-hour off road trip flew by. The bouncy jeep ride took us to see the gigantic red sandstone formation up close. Our driver stopped at a couple of scenic places for us to take pictures. He also pointed out that these red rocks used to be home to earlier dwellers thousands of years ago. Everything looked arid with a few short cactus decorating the area but magnificent nonetheless. 


Driving South

Jerome, AZ

We passed through a ghost town, Jerome, on our way to Scottsdale. What used to be a thriving mining town atop the hill in 1880s onwards with population of 15,000 is now a tourist destination and artist community of 450. Though galleries and shops fill its narrow and hilly streets, Jerome definitely maintains its tough wild west look and feel.

Not too far from Jerome is the Montezuma Castle National Monument. The carved limestone cliff served as a “high-rise apartment” home to the Sinagua people in 700 CE. We stopped by to check out this stunning piece of “real estate” from the past.

Traffic got heavier as we approached the Scottsdale. The landscape changed to the typical present day metropolitan America with huge highways and rush-hour congestion. Only tall cactuses along the way reminded us that we were still in the desert.

Our hotel concierge in Sedona told us that Scottsdale was a shopping mecca in the area. He should have said: a pampering mecca in the area. Restaurants, shopping malls, hotels, night clubs, and spas fill Scottsdale modern landscape. No wonder that it has been a popular domestic winter-getaway destination for some.

Joshua Tree

We drove back to Vegas in the morning to catch our flight back the next day. Tall cactuses seemed to disappear and Joshua trees came into view along the highway. We covered 1100 miles and entered a lot of new scenery into our memories in eight days.

Photos property of The Traveling Chili Pepper

Chunky Artichoke Dip

I am hooked on artichoke hearts and I look for more ways to enjoy them. One day I saw my friend Lindsay wrote a blog entry on Spicy Spinach Artichoke Dip. I knew it was a sign to do a dip. I have roasted artichoke hearts and have also put them in salad many times but have never done a dip before. The interesting part of Lindsay’s recipe was the Greek yogurt substitute for low-fat mayonnaise. I was very intrigued.

My first step was to check what I already had. I found one can of artichoke hearts in the pantry and some left over of frozen ones in the freezer. So I thought I’d just use them all up and do only artichoke dip this time. I also still had two types of cheese in the fridge: shredded Mozzarella and Cheddar—I used a handful of each (the recipe calls for Mozzarella, Parmesan, and Monterrey Jack). Though I deviated a bit from Lindsay’s original recipe, the dip was still pretty amazing. The artichoke hearts, Mozzarella, Cheddar, and the Greek yogurt created a delicious chunky dip. I enjoyed the thick consistency more than the usual creamy one. For once I could really taste the artichoke! The dip was definitely more fragrant due to the yogurt and more flavorful from the artichoke and cheese combo. The cayenne powder definitely kicked and enhanced the dish. I enjoyed using pita chips to scoop. 

Click the link to view the complete recipe: Spicy Spinach Artichoke Dip 

Thanks, Lindsay! What a great recipe!

Chicken Soup Cooked with Turmeric and Coconut Milk

(Harini’s Version of Soto Bangilan, Origin: East Java)

It’s hard to give a short answer to the question “What’s Indonesian food like?” It depends on: who is being asked and where in Indonesia this person comes from. Cuisines vary from one island to the next. People may also find unalike tastes and types of food in different parts of an island. Now imagine if you have thousands of islands. The immense diversity of culture, ethnicity, and dialect in the archipelago unquestionably gets reflected in the cuisines too.

I have been able to cook some of the home-cooked dishes I grew up with, mostly cuisines from West Sumatra and East Java. Though I have perfected some recipes I still have plenty to try and learn to do. Recently I taught myself to make one more dish native to one part of East Java: Chicken Soup with Turmeric and Coconut Milk (Soto Bangilan). Soto is basically chicken soup that is cooked with turmeric and is infused with spices. (The significance of Soto is its yellow color that comes from turmeric.) Bangilan is the name of a small town in East Java where this particular Soto can be found and enjoyed. There are many varieties of Soto throughout the island and in the country. Chicken Soto is very popular in Java along with Soto Madura which is of the Madura island origin.

Anyway, one day my mom and I had a food talk about Soto Bangilan. She kept talking about how delicious it was. I never had the dish before. Curiosity led me to ask for Soto Bangilan‘s recipe from one of my aunts. Thanks to her I was able to add one more dish to my recipe collection!

Here is my version of the recipe:

Ingredients:

  • 5-6 Smaller size of boneless chicken thighs (diced)
  • 2-3 Boiled eggs (halved)
  • 1 Lime
  • Sweet soya sauce (usually available at Asian grocery stores)
  • A handful of thin rice noodle (dip them in boiling water until they get soft, drain, and set aside)
  • 1 Box of chicken stock (32 oz)
  • 2-3 Handful of bean sprouts (dip them in boiling water for a minute or two, drain, and set aside)
  • A handful of fried shallots (usually available at Asian grocery stores)
  • White jasmine rice (The recipe calls for lontong, a compressed rice that can be cut into pieces like cakes. I prefer to have it with regular white rice.)
  • 5-6 Scallions (chopped)

Spices to be mixed in a food processor:

  • 3 Shallots
  • 1 Teaspoon of minced garlic
  • 1 Teaspoon of corriander
  • ½ Teaspoon of turmeric powder
  • 1 Inch of Galangal root
  • 5-6 Candlenuts
  • ½ Teaspoon of shrimp paste
  • Salt

Add to the pot:

  • 3 Kaffir lime leaves
  • 1 Lemongrass
  • 1 Can of light coconut milk (the original recipe requests for more coconut milk but I prefer to have it light)

Steps:

  • In a bigger pot, saute the spices, lime leaves, and lemongrass with a little canola oil
  • Add the chicken and mix well with the spices
  • Add the chicken stock and a cup of water (or two)
  • Let it boil until the chicken is well cooked, add the coconut milk, and stir
  • Let it cook for another 10 minutes
  • Add fried shallots to the broth

Serve in a deep plate or a bowl:

  • A little bit of white jasmine rice, bean sprouts, scallions, thin rice noodles, halved boiled egg, and pour the Soto (with the diced chicken) on top of them
  • Top with a little squeeze of lime and a little sweet soya sauce
  • Serve with a little sambal (chilies) on the side (Only for those who love spicy, please)
  • Mix everything and enjoy!

Here is how to make the sambal for Soto:

  • Boil 10-15 Thai peppers and 2-3 candle nuts for 5-10 minutes
  • Drain and chop them up in a food processor
  • Add a little salt and serve
  • Note: only take a little at a time and mix with the dish

Enjoy a bowl of multifarious goodness. The warmth of the soup and its big flavor fill up a hungry stomach perfectly. Leftover is to be expected. Great for next day’s lunch!

Serve 2-4


Easy Side Dish: Caramelized Brussels Sprouts

I think Brussels sprouts are cute. They are also delicious when cooked and spiced well. I like to have them as a side dish to my grilled fish and baked potato plate. Trust me and try it.

Brussels sprouts were another type of vegetable that I used to be curious about. I never tried them until recent years. They looked like tiny cabbages but I was clueless about their taste. I would see them at the grocery store and wonder about ways to prepare and enjoy them. Also, I did not remember to have this vegetable when I was growing up in Indonesia. So, by chance, a friend told me that she was not crazy at all about this vegetable due to its strong taste. I asked her how she prepared them and she said, “Well, I just steamed and ate them plain.” Aha! This confirmed what I’ve always believed about strong-tasting green vegetables: they are more delicious and enjoyable when spiced up well.

I did some recipe search on these little fresh and green vegetable and found a few that focused on caramelizing. After a couple of tries I felt like I got a version that fit my taste preference (and Jeff’s!).

Ingredients:

  • 8-10 Brussels sprouts cut in half
  • 2 Shallots chopped into little pieces
  • 1 Cup of chicken (or vegetable) stock
  • Salt and pepper
  • 1 Tablespoon of canola oil

Steps:

  • Heat up a pan and add the oil
  • Saute the shallots until they turn yellow
  • Throw in the Brussels sprouts and let them brown together with the shallots
  • Add chicken stock (you can also add chopped baby carrots if you want more colors in this dish)
  • Reduce the heat, cover the pan with a lid, and cook for 10 minutes or until the stock gets absorbed by the sprouts.
  • Add salt and pepper

The chicken stock takes away the vegetable’s strong taste while the shallots provides natural sweetness and appetizing aroma to the sprouts. The vegetable’s crunchy texture definitely complements a grilled fish plate well. Add either baked/mashed potato or mac and cheese as another side and you get a fantastic combo.

Serve 2

Stuck on My Mind: Chicken Pot Pie

Have you ever thought of one specific thing and all of a sudden you started to see it everywhere?  It could seem like the thought was following you and catching your attention every chance it got. Well it happened to me the other day. On one cloudy morning I thought about how great it would be to have some chicken pot pie. Sure enough when I checked my email I got an update from this food blog I subscribed to about… chicken pot pie. Then when I tuned into Cooking Channel later on that same day I saw two different shows presenting…chicken pot pie! I guess the chicken pot pie goddess must have wanted me to make the dish badly.

So I surrendered to the chicken pot pie calling and found a few recipes online and decided to  follow Rachael Ray’s: (click the link) Creamy Chicken and Mushroom One-Pot with Pie Toppers.

I did a little tweak to the recipe:

  • I used a frozen mixed vegetables (corn, carrots, green beans, and peas)
  • I opted out of using butter, heavy cream, and wine
  • Instead, for the broth, I mixed the poaching liquid, chicken stock, three tablespoons of flour, and a tablespoon of dijon mustard in a bowl. Whisked the broth well (until, as the author said, it “thickens to a light gravy consistency”) and then returned it back to the pot where the vegetables were cooking. Then I added the chicken back to the pot along with some salt and pepper

The meal was delicious, full of flavors, and fragrant. I especially enjoyed the peppery taste that came from the dijon mustard and the sweet aroma of sage. What a perfect winter meal!

So plan a movie night at home with loved ones, cozy up on the couch under a blanket, and enjoy a nice bowl of chicken pot pie. Have a good Monday!

Oh the Leftovers!

What to do with the Leftover Turkey

A couple of friends invited us to their house this past Thanksgiving for a traditional turkey dinner. And of course what’s Thanksgiving without leftovers, right? Our gracious hosts begged us to take some turkey meat home. Mind you, Jeff and I had a lunch planned and a dinner to host on the following day. So this turkey had to wait in the fridge.

After two consecutive dinner parties our fridge was full of leftovers. One morning I stared at the fridge thinking about ways to transform the extra food into new dishes. Turkey meat got my first priority. I also saw the veggie tray that a couple of friends brought for appetizer on Friday night and I still had some chicken stock.  Aha! A dish came to mind: Turkey and Vegetable Soup. But then I realized that we got quite a lot of the turkey leftovers that I could make another dish. I saw some leftover jasmine rice from yesterday’s lunch and I also found red hot finger peppers, Thai peppers, shallots, and onion too in my fridge—the perfect ingredients for fried rice. Another menu was born: Turkey Fried Rice.

Turkey and Vegetable Soup

I normally do this soup with chicken. But the turkey variation did not disappoint.  I was able to make it very flavorful. The trick was to leave the soup overnight in the fridge to be enjoyed the next day.

  • Heat up two cups of chicken stock and a half of cup of water in a pot over medium heat
  • Add salt, white pepper powder, a half of teaspoon of minced garlic, and a half of teaspoon of nutmeg powder for aroma and peppery flavor
  • Shred the leftover turkey meat and put it in the boiling soup
  • Chop the baby carrots, broccoli, and celeries from the veggie tray and mix them in the pot with the turkey
  • Let it cook together for about 15-20 minutes
  • Turn off the heat and let the soup cool down
  • Put it in the fridge overnight so that the turkey and the vegetables absorb the chicken stock and spices
  • Have the soup for lunch the next day
  • Serve with a bread on the side

Turkey Fried Rice

 First, infuse more flavors into the leftover turkey:

  • Heat up a cup of chicken stock in a pot over medium heat
  • Add salt and white pepper powder and let it simmer
  • Lower the heat and let the rest of the shredded turkey swim in the simmering chicken stock until the liquid is nearly gone

 Second, prepare the sauce for the fried rice:

  • Chop and mix five red hot finger peppers, three Thai peppers, one shallots, a teaspoon of minced garlic, and a quarter of onion in a food processor
  • Heat up a large deep skillet over medium heat
  • Add a half of tablespoon of canola oil
  • Sauté the sauce for a minute or two
  • Mix the cold (cooked) white rice with the red sauce in the skillet. For best result, make two or three cups of rice  the night before and then chill in the fridge
  • Stir until the rice is coated with the red sauce
  • Add salt
  • Drain the shredded turkey from the stock and mix them with the red rice
  • Scramble a couple of eggs in a frying pan and mix with the rice and turkey
  • Serve immediately with cut up lettuce and sliced cucumbers on the side
Note: Toppings for the fried rice may vary. You can also enjoy it with beef, chicken, or shrimp.

Warning: Spicy (Please adjust the number of chili peppers according to your spicy-tolerance level)

Standing Oven Round Roast Beef with Sweet Potatoes

Standing Oven Round Roast Beef by JNHoliday Dinner Menu (Part 3)

Jeff wanted to do a roast beef dinner with sweet potatoes for the holiday dinner. So he created his own recipe and it turned out to be a huge success. Our guests could not get enough of it. The peppery flavor of the steak went well with all of the side dishes: sweet potatoes, roasted butternut squash with Gouda cheese and pine nuts, and the artichoke, heart of palm, and avocado salad. The roast beef definitely earned its position to be one of our favorite dinner party menus.

A few days later I asked Jeff to tell me the ingredients for the roast beef and the steps to prepare it. I typed the recipe quickly and added it to this blog as another entry to our good cooking “database”.

So here is Jeff’s recipe:

Ingredients:

  • 8 lbs of round bottom round roast beef (cut in half)
  • Salt, freshly ground black pepper, chili powder, dried oregano, and salt-free steak seasoning
  • A cup of your favorite bold red wine (we used a cabernet)
  • Dried sage
  • Water

Steps:

  • Create a brine solution (to keep the steak juicy after roasting) in a large zip lock bag by mixing one or two cups of water with salt
  • Brine and soak the meat completely in the zip lock bag
  • Leave in the fridge for three days
  • Take it out of the brining bag and pat dry the day before the dinner party
  • Brush with canola oil
  • Prepare the steak’s dry rub mix in a bowl: freshly ground black pepper, chili powder, oregano, and a little salt-free steak seasoning (we used Trader Joe’s Steak and Chop Grill and Broil)
  • Massage the dry rub well into the meat
  • Place the marinated meat in a new zip lock bag and keep in the fridge overnight

About three hours before the dinner party:

  • Preheat the oven to 225F
  • Place the meat on an oven rack with a tray below it
  •  Put one cup of water on the tray and then cover it all with an aluminum foil
  • Cook until the steak’s temperature reaches 130F (it took us about 2 hours)
  • Take the meat out and crank up the oven temp to 500F and cook the meet for another 10 minutes
  • Take the steak out and cover with aluminum foil until serving

Prepare the steak sauce by collecting the juices from the cooking steak in the tray into a small pot. Mix with half cup of water, a cup of wine, and a pinch of dried sage. Let it simmer and reduce by half. Strain to make sure that there isn’t any dried sage in the sauce and serve.

Make the sweet potato dish:

  • Peel and cube  3-4 sweet potatoes
  • Boil with chicken stock, add a little salt, and cook until it is fork tender
  • Drain the potatoes and let it cool down before serving

Serve  7-9 people

Happy Holidays!

Salad Mix: Avocado, Artichoke Hearts, and Hearts of Palm

Holiday Dinner Menu (Part 2)

(See Part 1 : Roasted Butternut Squash with Gouda and Pine Nuts)

The salad that I prepared for the holiday dinner contained three things I loved: artichoke hearts, avocado, and hearts of palm. I found this recipe a while ago from Food Network and saved it in my recipe collection. Please click here to read the original recipe: Avocado, Artichoke Hearts and Heart of Palm Salad served in Lettuce Wraps

A few things I modified from the original recipe were:

-For the dressing, I used apple vinegar instead of white vinegar. I also drizzled a little olive oil and sprinkled some chili powder to give this salad a little kick.

-I added grape tomatoes for more flavor and color.

Canned hearts of palm are available in most grocery stores.

-The author called for butter lettuce as the serving cups for the salad. Unfortunately I did not have the time to do it. So I chopped the lettuce and mixed it with the rest.

The crunchy poblano pepper, cucumber, lettuce, and tomatoes gave a wonderful balance to the tender and buttery artichoke hearts, avocado, and hearts of palm. So delicious!

Note: Next time, I’d like to try another modification using the three main things: avocado, artichoke hearts, and heart of palm. I’d add grape tomatoes into the mix, drizzle all of them with olive oil and apple vinegar, and then sprinkle with salt and pepper. I think this variation would make a great appetizer.

Roasted Butternut Squash with Gouda and Pine Nuts

Holiday Dinner Menu (Part 1)

A few friends came to visit from out of town this past Thanksgiving weekend. Jeff and I got the honor to host a dinner party on Friday. Both of us were very pleased with how the food turned out. Jeff had made this delicious peppery oven roasted beef with gravy along with sweet potato as a side dish. I prepared a salad medley of artichoke, avocado, and heart of palm and a side dish of roasted butternut squash with Gouda cheese and pine nuts.

I’ve always been intrigued by butternut squash and been wanted to learn about the types of dish I could create from it. Though I must admit that I was a bit nervous about cooking this winter squash since I did not grow up with any dish made from it. 

Anyway, I had found a simple roasted squash recipe from Whole Foods that I thought I could use as the base of my dish. I felt like the recipe still needed some dressing up but I wasn’t sure what would work best. So I talked to a foodie and a cooking enthusiast friend, Leena, who shared a recipe she had made a few Thanksgivings ago. The idea was to cube the squash, roast them with a little chicken/vegetable stock for more complex taste, and then add soft cheese and nuts as the topping. It sounded divine and I trusted my friend’s taste in food. And I was so happy with the result.

So here’s how I did mine:

-I preheated the oven to 400F

-I cubed one small butternut squash and then cut the skin off with a knife (I found it to be much easier than trying to peel the whole thing).

-Then I placed the cubes on an oven tray and drizzled them with olive oil

-I also added 1/3 cup of chicken (or vegetable) stock on the tray

-Let the squash roast for 28 minutes

While the squash was cooking in the oven, I grated Gouda cheese in a food processor. (The amount of cheese depends on 
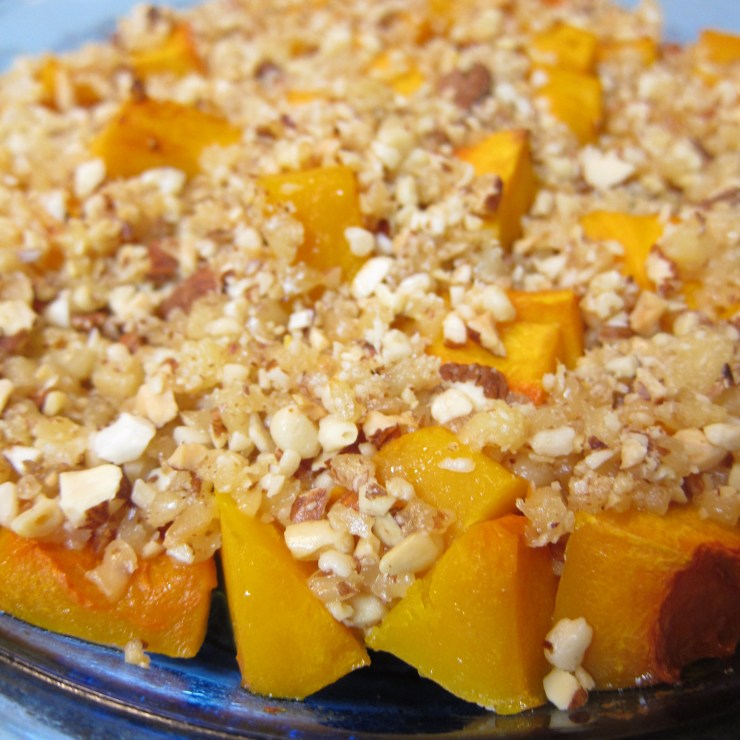
your preference. I used about two handful of it.) Then I added two tablespoons of pine nuts into the processor to be chopped and mixed together with the cheese. Jeff had chosen Gouda for the soft cheese due to taste preference and I chose to use pine nuts since they complement baked dishes and fruits/salad pretty well. Add chopped almonds for extra crunch.

After 28 minutes, I turned the heat off and took the roasted squash out of the oven. I sprinkled the cheese and nuts mix evenly on top of the hot squash. Then I returned the dish to the oven (with the heat off) for another two minutes to melt the cheese. I removed the tray immediately from the oven and let it cool down for 10-15 minutes before serving.

The dish was full of flavor as I wanted it to be. The chicken stock, smoky Gouda cheese, and chewy and nutty pine nuts gave this roasted butternut squash dish (as a friend described) “a very sophisticated taste.” Sure enough the plate was cleaned in no time. It was definitely a great side dish for a winter dinner party.