Grilled Jumbo Shrimp with Tomatillo Mango Salsa

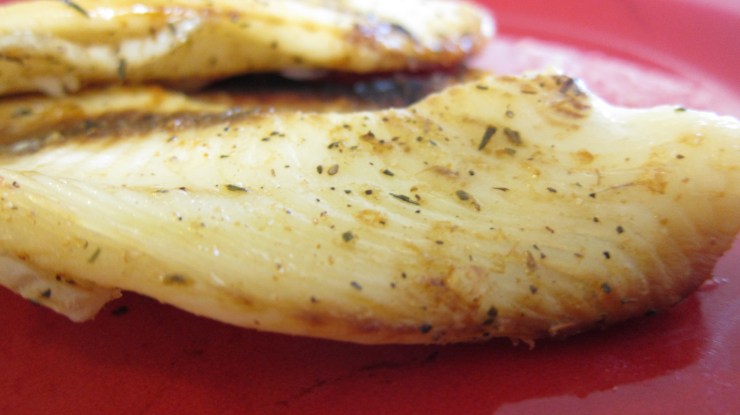
A good conversation with a friend could lift up the spirit. A good FOOD conversation with a friend could inspire and create a fantastic dish. Spicy grilled shrimp and mint chutney, along with other types of food, came up during the talk. Then for a couple of days, not sure how, my mind played a food puzzle game by itself. It combined these images of grilled shrimp, some type of sauce, and the ingredients I’d like to use together. These pictures seemed so real I felt like I could almost taste them. The next day, I produced my grilled shrimp with tomatillo mango salsa dish 🙂

Here’s how I do it. For the grilled shrimp, we will need:

  • 24 jumbo shrimp (raw, deveined, and shelled)
  • Lemon juice from 1-2 lemon
  • A handful of mint leaves (chopped)
  • A handful of parsley (chopped)
  • A teaspoon of minced garlic
  • Salt
  • Pepper
  • Cayenne pepper
  • 6-8 bamboo skewers (soaked in water for at least 30 minutes)

Steps:

  • Mix everything together in a zip lock bag and leave in the fridge for 30 minutes to an hour.
  • Thread 3-4 shrimp on each skewer
  • Fire up the grill to medium high and let the shrimp sizzle for 3-4 minutes on each side until they are pink and firm.

For the Tomatillo Mango Salsa:

  • 5-6 tomatillos (remove the husk and wash until the green tomatillos no longer feel sticky)
  • 5 Jalapenos peppers (please adjust the number to your preference)
  • A handful of cilantro leaves (chopped)
  • A tablespoon of minced garlic
  • Salt
  • 1 ripe mango

Steps to prepare the salsa:

  • Heat up a small skillet on the stove over medium heat.
  • Halve the tomatillos and chop the jalapenos
  • Add into the skillets and let them char a little
  • Add a tablespoon of water, cover with a lid, and let them cook for 5 minutes.
  • In a food processor, add the cut up mango, cilantro, garlic, a little salt, and the cooked tomatillos and jalapenos. Pulse until everything is mixed together.
  • Put the salsa in a bowl, let it cool down, cover with a plastic wrap, and place in the fridge before serving. I like the salsa to be served cold. I like it even better when I make it the night before serving. It gives all of the great flavors some time to chill and blend well with each other. There’s a little bit of everything in this salsa. It’s sweet, tangy, with a jalapeno kick, and fragrant with wonderful fresh aroma.
  • To serve, scoop the salsa into a serving plate and place the shrimp on top of it.

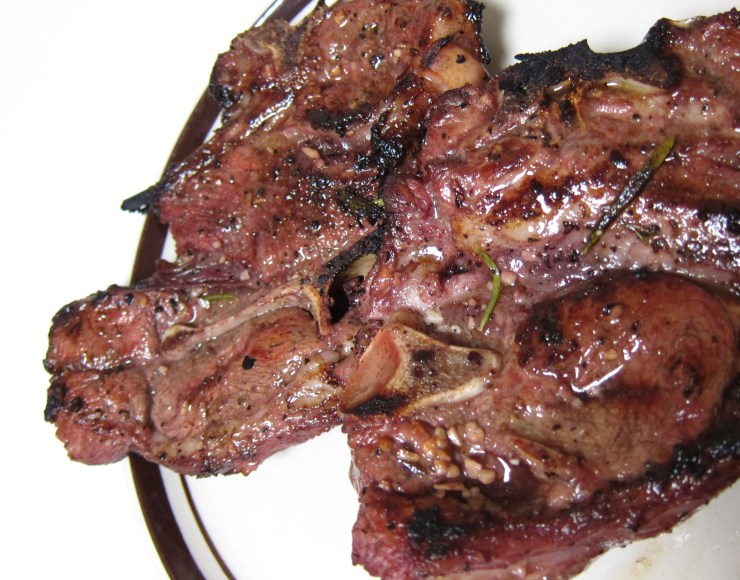
These two things could also be served separately. Next time, I’ll put the salsa on top of grilled (white meat) fish or on a nice skirt steak.

Have a great weekend!

Summer Fave: Grilled Lamb Shoulder Chops

Grilled lamb shoulder chops with sweet and spicy corn and tomato salad.

I may have found a summer favorite. Inspired by Ina Garten’s recipe (minus the yogurt mint sauce), I decided to experiment with a couple of lamb shoulder chops a few weeks ago. The amazing result has made me repeat this recipe a couple of times already. The marinade’s combination of rosemary, oregano, garlic, lemon juice, olive oil, and red wine work so well together in creating such a succulent grilled lamb.


I followed the recipe’s ingredient list but adjusted a few things:

  • Instead of using rack of lamb, I used lamb shoulder chops
  • Lemon juice from 1 lemon
  • 1 tablespoon of minced garlic
  • 3 tablespoon of olive oil
  • 3 tablespoon of red wine
  • 2 sprigs of rosemary (fresh from the garden, yay!)
  • A dash of dried oregano

Steps:

  • Mix all of the above in a big zip lock bag. Please make sure that all ingredients coat the lamb nicely. Leave the bag in the fridge and let the chops marinate for half a day or overnight.
  • Fire up the grill and, as Ina Garten’s recipe suggests, add salt and pepper on the lamb. Then let them sizzle on a medium-high heat grill for 5 minutes on each side.
  • Serve with my Sweet and Spicy Corn Salad and Tomato Salad. Hmm…insanely good!

Easy Summer Menu: Sweet and Spicy Corn Salad

A few weeks ago, Jeff prepared a corn dish to serve alongside our steak and tomato salad. He basically just cooked thawed frozen corn kernels in a little bit of butter and cayenne pepper powder. I couldn’t believe how that simple process produced such a delicious dish. I was hooked and inspired to create a salad out of it.

This colorful salad just screams summer, don’t you think? 🙂 It’s a little sweet and spicy, lemony, crunchy, and mmm…it’s got that wonderful cilantro’s fragrance!

Here’s what we will need for my version:

  • A bag of thawed frozen corn or peeled fresh corn kernels from four to six ears
  • One tablespoon of unsalted butter
  • One red bell pepper (cored and chopped)
  • Cayenne pepper powder (I also added three fresh cayenne peppers. But PLEASE adjust to your piquant-tolerance level)
  • Salt
  • Black Pepper
  • A handful of chopped cilantro (if you’re not a cilantro fan, go with parsley).
  • Lemon juice from 1 lemon

Steps:

  • Heat up a medium pan
  • Melt the butter
  • Add the chopped bell pepper and corn kernels. Cover with a lid and let cook for 5 minutes (until the butter and water that comes out of the corn and bell pepper start to bubble).
  • Remove from the heat
  • Add salt, pepper, a dash of cayenne powder, cilantro, and drizzle with the lemon juice. Mix and serve. You could also chill it in the fridge and serve it cold.
This time I served the corn salad with grilled lamb shoulder and tomato salad. Delicious!

Easy Summer Menu: Colorful Tomato Salad

I like tomatoes. They are so colorful, plump, and cheerful. When I was little, mom used to make a refreshing treat out of tomatoes. She’d cut them up, mixed with crushed ice, and sprinkled sugar on top of them. Delicious!

I have two tomato plants growing and I can’t wait until they start bearing fruits! Since I can’t have my own home-grown tomatoes yet, I got these wonderful and colorful ones from the market the other day and turned them into a delicious summer salad!

I just sliced the tomatoes in big wedges, sprinkled them with a little salt and black pepper, drizzled an equal amount of olive oil and balsamic vinegar (you could also use red wine vinegar instead of balsamic if you want), and added basil leaves I picked from my container garden. I covered the plate and chilled it for a bit before serving. Easy and yummy!

I served this salad with the steak that my guy grilled for us and the sweet and spicy corn salad (next entry) that he also made. Mmm…another fabulous dinner!

Easy Summer Menu: Baked Martabak (Martabak Panggang)

Summer is almost here! Time to slow down and enjoy the gorgeous days. As we ease into the warmest season of the year, I plan to stay cool and light in both what I wear and what I cook/eat.  So for food, I am compiling recipes that might go well with my idea of summer menu: simple, light, and delicious. One dish that I thought about immediately was martabak, one of my favorite street food in Indonesia.

Baked Martabak

Recently, inspired by a recipe I found online, I baked martabak instead of following the street vendor’s traditional way: frying (less oil mess, less stress). They came out crispy and delicious.

Here’s my version:

(Make 8-10 martabak)

INGREDIENTS:

  • 3 eggs
  • 1 pound of sirloin ground beef
  • 1 teaspoon of minced garlic
  • 3 bunches of scallions (chopped)
  • 1 egg for eggwash
  • ½ cup of vegetable oil
  • 1 teaspoon of curry powder
  • 1 tablespoon of cayenne pepper powder
  • Salt

STEPS

Making the mixture:

  • Preheat the oven to 350 degrees Fahrenheit.
  • Heat up a tablespoon of vegetable oil in a medium pan (over medium heat)
  • Add garlic and let it sizzle for two minutes.
  • Add curry powder, cayenne pepper powder, and salt. Mix together with the garlic.
  • Add ground beef and mix it with the spices.
  • Dump the juice from the meat and let the beef continue to brown.
  • Taste and add spices if necessary.
  • Add the chopped scallions, mix them up with the beef, and set the pan aside.

Folding the martabak:

  • Pick up 3 fillo dough sheets for each piece of martabak, brush with the rest of vegetable oil, scoop the beef mixture, and add to the middle of the sheets. Repeat.
  • Place the folded martabak on a greased oven tray, brush the top with eggwash, and place into the oven for 20 minutes until they are golden brown.
  • Let them rest for a couple of minutes, cut in the middle, and serve. (I made mine a bit bigger and then I cut them before serving).
  • Serve with Thai peppers (optional).

    Hot out of the oven

More to come later!

Container Gardening and My Nemesis

Like many people, I get excited over the arrival of spring. I relish the longer and warmer days and I plan to be outside as much as I can. Also like many others, I plant in the spring time. Due to space limitation I stick with container gardening, which I have been doing for a few years now. I started with growing flowers and chili peppers in containers outside of my apartment windows in Chicago. Now that we live in an apartment with a patio that opens up to a grassy area, I have a little bit of space for more plants.  This year I focus on herbs and vegetables that I use a lot in my cooking. So far I have:

parsley and rosemary,

tomato,

Cayenne peppers, sweet basil, Thai and Serano peppers, and another tomato.

I also have jasmine, impatiens, lavender, citronella mosquito plant, mums, and a couple of other flowers.

The nemesis eating my tomato

Of course like many of those who garden, I also have a nemesis. I caught him eating my tomato one day. A few days later, my sweet upstairs neighbor confessed that she’s been feeding my nemesis recently. She thinks that feeding the chipmunk will make it full and stop eating my young tomatoes.  But I am thinking that it might invite more chipmunks to party on her patio.

Meanwhile, I am sprinkling cayenne pepper powder around my tomato plants. A tip I found online somewhere. Let’s see if it works. So far so good though.

PS: If you a name suggestion for my nemesis, I am all ears.

Crispy Baked Tilapia

(Author revised on April 12, 2013)

I like a variety of white fish like snapper, halibut, and tilapia. In my opinion, tilapia happens to have a very mild taste suitable for Indonesian cooking, which normally uses a lot of spices. For readers in Indonesia, I imagine dori, gurame, or red snapper fillets would work great for this recipe.

So here’s what we’re going to need (feel free to adjust the spices to fit your preference):

  • 4 Tilapia fillets (medium size)
  • 1 teaspoon of salt
  • ½ teaspoon of ginger powder
  • 1 teaspoon of black pepper powder
  • 1 teaspoon of cayenne pepper powder (substitute with chili or paprika powder if you prefer it to be milder)
  • A pinch of dried oregano (optional)
  • 1 tablespoon of white vinegar (optional)
  • 1 lemon

Steps:

  • Spray or grease the oven tray with a little bit of olive oil or canola oil.
  • (Optional) Mix the white vinegar with a little bit of water in a small bowl and give the fillets a quick rinse. And then rinse with water. (I do it to lessen the fishy aroma a little bit.)
  • Place the fish on an oven tray.
  • In a separate bowl, mix the salt, ginger, black pepper, cayenne powder.
  • Heat the oven to 425 degree Fahrenheit.
  • Sprinkle and coat the fish with the mixed spices. Let the fillets sit for about 10 minutes.
  • Cook for 12-13 minutes.  Do a longer bake time if the fillets are bigger/thicker.
  • For more crisp, turn the oven broiler (after baking) for about 3-4  minutes. Leave the oven door slightly (like 2 inches) open to avoid charring.
  • When it’s done, the fish will have that light golden color and crispy texture on the outside but fluffy in the inside.
  • Serve with lemon wedges on the side.

Serve 2-3 people

Tempeh with Chillies and Vegetables – An Easy and Tasty No-Meat Dinner

Once in a while, Jeff and I do a no-meat dinner at home. Meatless menu isn’t really anything new to Indonesians. Many depend on either plant-based like tempeh or on a variety of seafood anyway as their sources of protein.

I think I’ve mentioned in my other recipe that tempeh is one of staple food in Indonesia. This soy-based patty shows up a lot at Indonesians’ dinning tables along with its partner: the fried white tofu (sadly, I can’t seem to find the same kind of tofu here in the US). Usually, tempeh is sliced, seasoned with a little bit of salt, fried until its light golden, and served with chillies, some vegetables, and rice. I also like it cooked with chillies. We call it sambal tempeh and it’s got both spiciness and sweetness to it. Yum!

Here’s my version. I like to serve this dish with my spinach and corn vegetable soup, crispy baked tilapia , and rice.

  • 2 tempeh patties (usually sold at the grocery’s organic section)
  • 1 bag of frozen peas and carrots (small bag)
  • 2 tablespoon of minced garlic
  • 6 hot finger peppers (chopped)
  • 4 Thai peppers (chopped)
  • 3 tablespoon of low sodium soy sauce
  • 2 tablespoon of sweet soy sauce (substitute: mix two tablespoon of soy sauce and one tablespoon of honey)
  • ½ onion (chopped)
  • Black pepper powder to taste
  • 2 tablespoon of canola or vegetable oil

Steps:

  • With clean hands, break the tempeh patties into smaller parts.
  • Heat up the oil in a pan (medium heat)
  • Add the garlic and onion into the pan and let them sizzle for a minute until they turn yellow.
  • Add the tempeh and mix it up with the garlic and onions. Let it cook for a while until it turns light brown.
  • Add the peas, carrots, chopped peppers, both soy sauces, and black pepper.
  • Stir and mix it all up.
  • Cover with a lid and let them cook for another 10 minutes.
  • Serve with rice

Serve 4-6 people

Returning to Puerto Rico

We returned to Puerto Rico for our friends’ wedding. The bride and groom exchanged their vows on a sweet spot on  San Juan‘s Condado Beach. Witnessed by beloved family, friends, the ocean, the wind, and the sun, the happy couple beamed. They looked like they just stepped out of a fairy tale, breathtakingly beautiful. We were all enchanted.

After two days of wedding fun and catching up with friends, Jeff and I set off to Ponce. Wanting to experience the mountainous region of Puerto Rico, go off the beaten path for a bit, and absorb the local culture, we chose a less straightforward route from San Juan to Ponce. We went west on route 22 and then south on route 10.

We stopped by La Cueva del Indio, an off-the-map cave site by the ocean, in Arecibo area. A woman named Carmen welcomed us as we parked in front of El Coayuco cafe. She gave a brief overview about the cave and told us how to get around the site. According to Carmen, Taino Indian (15th century) used the cave to hide from the Spaniards. We then paid $2 for parking and went on a short hike to the cave. The challenging hike on the cliff’s spiky and rocky surface led to a few magnificent views of the area. The cave itself hid at the bottom of the cliff. It looked like some kind of an entrance to the underworld. A ladder was prepared for those who wanted to see the inside of this small hiding place with an opening to the ocean. Carmen said that the Taino used that opening to swim away from the Spaniards chase. A few petroglyphs covered the walls of the hideout and some bats hung out at the very tall ceiling of the cave. We climbed back up to take in the gorgeous scenery of the ocean and the surrounding beaches. The ocean breeze sure felt nice.  We ended the visit with gulping coco frio that Carmen sold (at $1.50 a coconut) at the cafe. The perfect thirst quencher on such a hot day.

Another off-the-map site we visited was Cueva Ventana on route 10. A short hike inside of the cave would have taken us to a picturesque view of the valley. But as we got close to the mouth of the cave, the sky turned dark and started to growl with thunder and lightning. Not fully equipped with hiking/rain gear we decided to retreat. The minute we reached our car, as if on cue, the rain poured hard and lasted for the whole afternoon.

We continued the trip to Lagos dos Bocas, a merely 10-minute drive from Cueva Ventana, for lunch. I asked a girl, who was waiting around with her family, to tell me about how to get on the ferry to go to the restaurant across the lake. She explained that there were four restaurants we could go to. She also mentioned that this particular line she was in was for El Fogon de Abuela restaurant and that I should get on the wait list. Then she pointed to a guy who has the wait list. This friendly and kind gentleman, Francisco, took down our names and asked us to wait for the ferry. He warned that it might take a while since all of the four restaurants were full and busy. It was Mother’s day after all! (You could also drive to the restaurant. But hey, “When in Rome…”) Thankfully, Jeff and I had a big breakfast to hold us over. Joining all local tourists, mostly families with children, we waited. Meanwhile, the rain continued to fall.

Finally Francisco called our names and the short boat ride took us to El Fogon de Abuela. The restaurant has this open-air but covered seating area with a nice view of the lake and a relaxed ambiance. Jeff ordered a super delicious goat stew and I had my favorite Puerto Rican cuisine: shrimp mofongo. We only heard Spanish conversations that afternoon. I wished I spoke the language so that, at least, I could respond properly to the nice woman who offered me her umbrella. But she also understood and spoke English anyway (as many do in Puerto Rico). In a strange but good way, it felt nice not being able to tune into any conversations for a moment. We simply enjoyed the happy and friendly environment.

After refueling with mofongo and goat stew, we headed south to Ponce. Route 10 became this curvy route 123 passing through small towns such as Utuado and Adjuntas. From the road, the little towns looked like they had these low-hanging clouds, mountains, and valleys as the backdrop. The view reminded us of Tretes in Java. Quaint and beautiful. Each little town we passed seemed to have its own little cafe playing either reggaeton or salsa music. Local patrons sat and enjoyed each other’s company. We crawled slowly on this very narrow and winding two-way road. Thankfully we got a small rental car.

It was late when we got to Ponce. We drove into the historic colonial district and checked into our hotel. Didn’t want to waste a beautiful night, we joined the Ponceños and just hung out at the their town’s main square, Plaza Las Delicias.

The next morning we drove northeast toward Fajardo to catch our East Island Excursion catamaran tour to Culebra island. Ocean fun was next in our itinerary. With all English speaking tourists we snorkeled for a bit at the Luis Pena underwater preserve and then spent the rest of the afternoon at the Flamenco beach of Culebra. While in Fajardo, we also caught a night tour to check out the Bioluminescent Bay. It was my first time to kayak…at night…in an ocean bay that illuminated when touched!

We left Fajardo late morning. It was time to return to San Juan and the airport. I tried to stretch our Puerto Rico experience a little longer by asking Jeff to pull up for an early lunch somewhere along highway 3. There were tons of food kiosks along the way. As the saying goes, “When in Rome, do as the Romans do.” 🙂

Notes:

  • On the part about snorkeling in Culebra, the tour provides snorkeling gear. But we brought our own since we have them. Lunch, snacks, and drinks are provided during the tour.
  • Bring a light rain jacket when traveling to Puerto Rico in May. It’s their rainiest month!
  • The restaurants at Lagos dos Bocas are open during the weekend.
  • A smile and saying “Hi” goes a long way. The Puerto Ricans we met were the friendliest people.

Travel info sources:

Photos property of The Traveling Chili Pepper

Mini Mascaporne, Hazelnut, and Honey Cup Loaf Cakes

A good and descriptive storytelling could really captivate an audience attention and inspire her to try something new. My friend Leena and I would engage in a food talk once in a while. We’d discuss…well…good food, restaurants and their cuisines, and recipes. Recently, she talked about her favorite cupcakes in such great details that images of cupcakes started to float around in my mind. For days! And I wasn’t even a cupcake person. She’s really good, that Leena :). It was a sign for me to bake again.

So I studied a few recipes and combined the two that I liked the most. I wanted something that had a great combination and wasn’t too sweet. Inspired by Giada De Laurentiis’ Spiced Apple Walnut Cake (that she turned into a cupcake recipe in her Weeknights with Giada book) and Mascaporne Mini Cupcakes, I present my latest baked goods: Mini Mascaporne, Hazelnut, and Honey Cup Loaf Cake sans frosting.

Jeff and I simply love the firm and nutty texture of the cake. The aroma and taste of honey and hazelnut are just delightful. These little cakes make a perfect pair with morning coffee. Watch them disappear quickly from the tray 🙂

Here’s the ingredients list:

  • 8 ounces of Mascaporne cheese (1 cup)
  • 3 eggs
  • Âľ cup of vegetable oil
  • Âľ cup of light brown sugar
  • ½ cup of honey
  • 1 tablespoon of pure vanilla extract
  • 3 cups of all purpose flour
  • 1 ½ teaspoon of baking powder
  • 1 ½ teaspoon of baking soda
  • ½ teaspoon of fine sea salt
  • 1 cup of chopped hazelnut (or Filbert)

Steps:

  • Preheat oven to 350 degrees F.
  • Line two 24-mini muffin tray with paper baking cups.
  • In a large bowl and using a hand mixer, mix Mascaporne, eggs, and vegetable oil until they become one creamy mixture. Add brown sugar, honey, and vanilla extract. Mix all wet ingredients well.
  • In another large bowl, combine the dry ingredients: flour, baking powder, baking soda, and sea salt.
  • Mix the combined dry ingredients with the wet mixture. Fold the chopped hazelnut.
  • Using a spoon, scoop the batter to fill the mini cups well below the rim
  • Bake for 15  minutes. The cakes will have this beautiful light golden shade. (To make sure the cakes are done, I insert a skewer into the cake. When it comes out clean, I know the cakes are ready to cool down.)
  • Let the cupcakes cool down for 20 minutes before serving.

Make 48 mini cup loaf cakes