Mango Sambal Over Broiled Tilapia

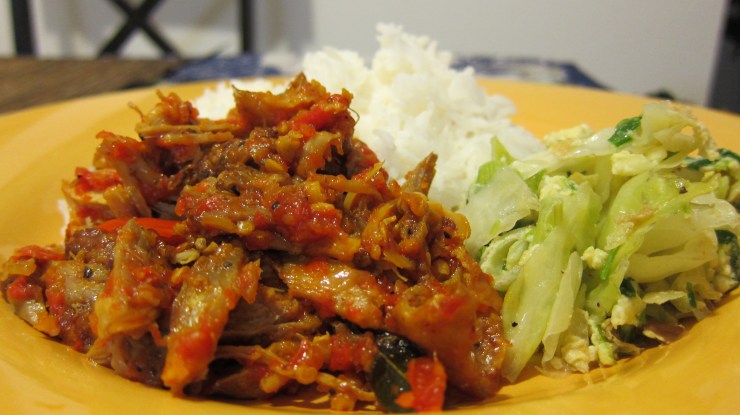
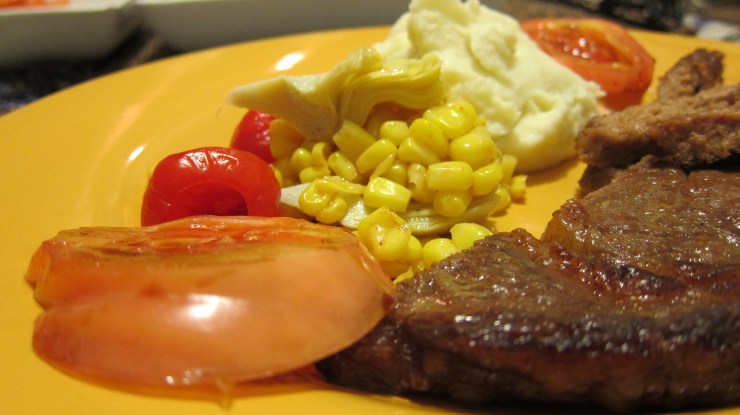
In Surabaya, there’s this incredible sambal mangga or chili pepper condiment that is mixed with thin-sliced mango. (In Bahasa Indonesia: sambal refers to crushed chili peppers mixture and mangga means mango.) The condiment is usually served with grilled fish, squid, or prawn, and steaming hot jasmine rice. It is simply to die for, as my sister would say. This sambal and the grilled seafood are my must-haves when I return to my homeland. Here’s what the condiment looks like. Whenever I look at this picture, I experience a Pavlov’s dog moment. Ding!

Mango Chili Pepper Condiment at Asia Baru Restaurant in Surabaya
Thin-sliced mango in chili peppers: A condiment at Asia Baru Restaurant in Surabaya (Picture by Harini, 12/12)

Inspired by mango sambal at a local seafood restaurant in Surabaya, I created something similar to accompany my broiled Tilapia.

Tilapia covered by Mango Sambal
Tilapia covered by Mango Sambal by Harini

Here is how I do the manggo sambal (My recipe for the broiled Tilapia is right below it.)

Warning: Spicy!

We will need:

  • 1 mango (I find one that is ripe but not too soft)
  • 3  Thai peppers
  • 5 hot finger peppers
  • 2 shallots
  • 1 garlic
  • 1 small tomato (or 4 grape tomatoes)
  • Salt

Steps:

  • I peel the mango and gently slice it into thin cuts (lengthwise). Then stack the mango meat together and start slicing them into skinny cuts. Plate them and set aside.
  • Make the sambal in a food processor by mixing and chopping: Thai peppers, tomato, hot finger peppers, shallots, garlic. Add salt.
  • Mix the mango and sambal together.

Mango sambal by Harini

For the broiled Tilapia: (or your preferred mild-tasting fish), we’ll need:

  • 4  fillets (thawed)
  • Salt
  • Pepper
  • Ginger powder (a pinch)
  • Turmeric powder (a pinch)
  • Coriander powder (a pinch)
  • 1 tablespoon of vegetable oil
  • 1 Lime (lemon works too)

Steps:

  • In a bowl, mix vegetable oil, salt, pepper, ginger powder, turmeric powder, coriander powder, lime juice from half of lime 
  • Coat the fillets with the marinade and let them sit for 15 minutes. Make sure they are coated evenly on both sides.
  • Heat the oven broiler
  • Grease the oven tray and place the fillets on it.  Broil for 8-12 minutes (no turning) until the fillets turn golden brown, crispy on the outside, and flaky in the inside. Give at least 6 inches of distance between the broiler and the tray.

Broiled Tilapia by Harini

Plate the fish and top with the mango sambal. Serve with hot jasmine rice. Add some more lime juice from the other half if necessary.

Ding!

Serve with rice by Harini

More Tilapia recipes:

Crispy Baked Tilapia

Spiced Up, Steamed, and Broiled Tilapia

Have a great weekend!

Roasted Brussels Sprouts, Sweet Potatoes, and Sweet Onion

Once upon a time, there was a girl who didn’t like any vegetables. Not peas, not broccoli, not spinach, not eggplant. Brussels sprouts? Forget it. I heard that trying to convince her to try vegetables was nearly impossible. So I never tried. Until one day, her friends ordered a plate of delicious roasted Brussels sprouts. Yummy, crunchy, and crispy. She tasted one and became a believer. A believer in the fact that vegetables can be (even more) tasty and enjoyable when seasoned and prepared in certain ways. The girl is a dear friend of mine. She gave me her permission to use this story as long as she remained nameless :D. So I dedicate this entry to her: my good friend who is, slowly but surely, starting to enjoy delicious vegetables.

Roasted Veggie Combo by Harini

I think of food preference as something personal, cultural, and habit driven. Sometimes, I feel like it is also colored by each individual’s beliefs, experiences, memories, and perception. A fascinating thing to observe. So I digress. Anyway, in the spirit of enjoying tasty and delightful veggies, I offer you my latest favorite side dish, late night snack, and (sometimes) breakfast. I like them THAT much!

Roasted Veggie Combo by Harini

My current favorite roasted-veggie combo contains of Brussels sprouts, sweet potato, and sweet onion. The sweet potato and onion absorb the spicy chili powder, salt, and black pepper really well. The vegetables’ natural sweetness and peppery seasonings complement the nutty flavor of Brussels sprouts nicely. Here’s how I do it. We will need:

Brussels sprouts

  • 10 Brussels sprouts (Remove Brussels sprouts’ end of the stem and outer leaves. Halve the vegetable.)
  • 1 sweet potato (Cut into thin wedges)
  • ½ sweet onion (Slice into thin wedges)
  • Extra virgin olive oil
  • Salt
  • Black pepper
  • Chili powder

Steps:

  • Preheat the oven to 400 degrees Fahrenheit
  • Drizzle the vegetables with olive oil and sprinkle with salt, black pepper, and chili powder. Coat each one of them.
  • Place all vegetables on a large oven tray. Give space between vegetables, avoid crowding them up.
  • Let them roast for 15 minutes, flip, and cook again for another 5 or 7 minutes.
  • Serve 2

Note: Sometimes, when I do Brussels sprouts only, I just broil them for about 5–8  minutes. Heat the broiler for a minute before starting. I give more than 8 inches of distance between the broiler and the tray, or use the middle or lower rack, and leave the oven door ajar, just a little bit, to avoid charring.

Broiled Brussels Sprouts by Harini

Hope you like it. Thanks for visiting!

Great tips on roasting veggies from Food52

How to Roast Any Vegetables

More Brussels sprouts recipes:

Caramelized Brussels Sprouts

Potato with Shiitake Mushroom, Sweet Corn, and Brussels sprouts

Grilled Nutella Sandwich Dusted with Powdered Sugar

Nutella sandwich dusted with powdered sugar by Harini
Nutella sandwich dusted with powdered sugar (by Harini)

Years ago, my friends and I frequented Quartino in Chicago. We would go to this Italian tapas restaurant, usually, right after work. Most of us worked, some lived, in downtown Chicago at that time. So Quartino was a good place in a central location  for a bunch of friends to regroup and replenish. We’d sit at the lively bar section, crowded our small table with wine, pizza, cheese, various small plates, and some desserts. Conversations about work, bosses, coworkers, relationships, dating, would swim together with other topics like cultures, politics, and whatever world affairs happening at the time. Time has flown by, people have moved away, but Quartino remains to be a memorable hang out spot for me.

grilled nutella sandwich by Harini

Recently, I had the chance to return to the restaurant with a couple of old friends. One of them had mentioned Quartino earlier that day and our afternoon saunter just happened to take us close to the place. So we took it as a sign to pay a visit.

Far from feeling hungry, we just ordered drinks. But then my friend Farah asked the server, “Do you guys still have Nutella Panino?” The server said yes and took the order. I had forgotten about this simple/cannot-go-wrong dessert. Then I remembered how most of my sweet tooth friends loved this grilled Nutella sandwich. Why wouldn’t they? It’s a sandwich filled with Nutella spread, grilled, cut up, and dusted with powdered sugar!

Back in my apartment, I made my version of the panino for Jeff. I think it may have made him fell in love all over again—either with me or with Nutella 😀

So here’s how I do my version of Nutella Panino.

(Eater discretion is advised)

To serve two, we will need:

  • 4 slices of bread (I am loving these Wholesome Oatmeal bread at the moment)
  • Nutella spread
  • A little bit of butter
  • A little bit of powdered sugar

oatmeal bread

Grill the sandwich and gently press down with a small pan lid

Steps:

  • Heat up a small non-stick pan. Stay on medium heat. (I don’t have a panini press so I grill the sandwich manually)
  • Spread Nutella on one side of a bread and cover with another bread
  • Add a little bit of butter on the hot pan until it is melted
  • Place the sandwich on the pan, grill, and press very gently with a small pan lid until the bread gets that nice golden color
  • Turn and grill the other side
  • Remove and let it cool down
  • Repeat the steps for the other sandwich
  • Cut up the sandwiches
  • Dust with powdered sugar

Great snack to serve with dark, robust coffee.

Hope you like it and thanks for visiting!

Buon Appetito!

cut up Nutella sandwich by Harini

Nutella sandwich by Harini

To my old Chicago pals

Stir Fry: Green Beans and Tempeh

I enjoy a tasty and crunchy vegetable dish. When I want an easy one, I often turn to stir-frying (similar to sautéing) things like green beans, bitter melon, asparagus, broccoli, Chinese broccoli, Napa cabbage, carrots, and many more. Cook with a little bit of oil, shallots, garlic, hot peppers, and light soy sauce and watch how the vegetables turn into wonderful delights. When I want something more substantial out of these veggies, I combine them with either Shiitake mushroom or tempeh. Superb!

Green Beans and Tempeh by Harini

Green beans and I go back a long way. Years ago in early college days, days of my first attempts to cook, a friend noted that I cooked green beans a lot. He’d joke and say that it seemed like it was the only thing I was able to do :D. He wasn’t wrong. It was! 😀

Tempeh with Green Beans by Harini

Anyway, in this recipe I choose to mix crunchy green beans with tempeh. Tempeh, a soybeans-based patty, is so versatile and a source of protein. Indonesians use it as their meat substitute. Here in the US, tempeh can be easily found in the organic section.

Ingredient list:

  • 1 organic soy tempeh (8 oz) (cut into four pieces and slice into thin cuts)
  • A handful of green beans (about 2 cups)
  • 2 shallots (chopped)
  • 2 garlic (chopped)
  • 2 Thai peppers, also called as Bird’s Eye peppers (chopped)
  • 2 tablespoon of light soy sauce
  • 3 tablespoon of vegetable/canola oil
  • ¼ cup of water

Steps:

  • Heat up a medium pan over medium heat
  • Add 2 tablespoon of vegetable/canola oil
  • Brown both sides of tempeh (turn only once)
  • Remove from the pan and set aside
  • On the same pan, use remaining oil if available, if not, add 1 tablespoon of vegetable/canola oil
  • Add shallots and garlic and let them cook for 2-3 minutes
  • Add the light soy sauce, Thai peppers, and green beans
  • Stir and mix them together
  • I usually add a little bit of water to help the vegetable cook better (about 1/4 cup)
  • Cover the pan with a lid and let it cook for about 5 minutes or until the liquid starts to boil. Taste and adjust.
  • Remove pan from the heat and add the cooked tempeh. Mix everything together and serve with jasmine rice.

Hope you like it!

More favorite tempeh recipe:

Tempeh with Chilies and Vegetables

Chili-Topped Tempeh

***

A little reflection:

I think of cooking, like writing, as one of my creativity outlets. One that allows flow to happen and take over me for a little bit. Maybe my friend and fashion blogger (and a fellow cooking enthusiast), Leena, would agree that there are some similarities in the process of putting together a beautiful outfit and making a delicious dish. I imagine they both require imaginative minds; attention to texture, colors, feel, and in cooking: taste; and appreciation for beauty. Best of all, they both create enjoyable results!

Cooking might not create flow for everyone as it does for me. Besides, different folks different strokes, right?

So, what about you, dear readers?

What fully absorbs and captures your creative energy?

Egg Noodles and Sea Scallops in Eggplant, Pepper, and Tomato Sauce

Egg Noodle with Scallops in Eggplant/Tomato Sauce by Harini

My kind of pasta dish: spicy and loaded with seafood and vegetables.

Egg Noodles with Sea Scallops in Eggplant/Tomato Sauce by Harini

Last summer, I wrote about an eggplant/peppers/tomato dish that I learned from a good friend of mine. I really liked the dish and this time I decided to mix it up with some egg noodles and sea scallops. Definitely another favorite pasta dish: light, infused with great fresh produce flavors, and boy…would you just look at the colors! Such a treat for the palate AND the eyes.

Here’s how I do the eggplant/peppers/tomato sauce:

  • Get 2-3 smaller and skinnier eggplants (or 1 big eggplant)
  • Halve the eggplants and cut into 4 long pieces
  • Chop them up into shorter cuts
  • Dice 4 medium size tomatoes
  • Mince 4-5 garlic
  • Chop 1 red bell pepper
  • Chop 5-7 hot finger peppers (Serrano or jalapeno would work too. Warning: spicy! Please adjust to your spicy-tolerance level)
  • Heat up a medium pot with a tablespoon of olive oil
  • Let the garlic sizzled for 2 minutes, add all of the above, sprinkle a little salt and pepper into the pot
  • Close with a lid and cook until the eggplants turned soft and translucent (15-20 minutes over medium heat)

Prepare the egg noodles:

  • Bring water to a boil in a medium pot, add a little bit of olive oil and salt, and cook 2-3 cups of egg noodles for about 6-8 minutes (or as directed on the bag)
  • Drain and set aside

Prepare the sea scallops:

  • Drizzle extra-virgin olive oil and lemon juice from 1-2 lemons on the (thawed) 8-10 scallops
  • Sprinkle a little bit of salt and black pepper
  • Let them sit for about 10-15 minutes to marinate
  • Heat up a non-stick pan (medium heat) and sear the scallops for 2-3 minutes on each side (until both sides get that beautiful golden crust).
  • Set aside

Mix the egg noodles with the eggplant/pepper/tomato sauce, top it with some scallops, and eat up! :).

(Serve 2)

We’re inching closer to spring time in this part of the world. Still cold. But at least the sun is out today! Wishing you all for some good weather wherever you are.

Thanks for stopping by!


Spicy Shredded Chicken

Spicy Shredded Chicken by Harini

(My version of Ayam Suwir. Origin: Bali)

Another big hit at home: tender, juicy, flavorful shredded chicken, covered in a mixture of cooked chili peppers. There’s heat, spices, but also a hint of sweetness from the cooked peppers, shallots, and garlic. Very exciting for the palate, that’s for sure. I learned about this dish from a friend from Bali many years ago and have been a fan ever since.

Like many of you cooking enthusiasts out there, I adjust recipes to suit my taste preference. Here’s a version that I am very pleased with, for now ;).

Note: Some prefer to boil the chicken with spices until it is cooked, then shred, and mix it with the blended and cooked chili peppers mixture. I, however, find that when boiled, the chicken gets to be a bit too dry. So what I do is I marinate the chicken overnight or half a day, roast it in the oven, shred, and mix with the peppers.

Serve 3-4

Ingredient list:

For the roast chicken:

  • 5-6 chicken thighs, bone-in and skin-on (chicken breast would work too)
  • 4 shallots
  • 4 garlic
  • 3 keffir lime leaves (could be substituted with lime zest from 2 limes)
  • 1 lemon grass (could be substituted with lemon zest from 1 lemon)
  • 1 inch of galanga root
  • 2 teaspoons of coriander powder
  • ½ teaspoon of turmeric powder
  • ½ teaspoon of ginger powder
  • Salt

For the chili pepper mixture:

  • 1 red bell pepper
  • 4 Thai peppers (also called Bird’s eye chili). Please adjust to your spicy-tolerance level.
  • 3 shallots
  • 3 garlic
  • Salt
  • 1 tablespoon of vegetable or canola oil

Steps in preparing the chicken:

  • Fill up 1/3 of a medium/large pot with water
  • Chop in a food processor: shallots, garlic, and keffir lime leaves. Add them into the pot of water along with lemon grass, galanga root, coriander, turmeric, ginger powder, and salt to create the marinade for the chicken.
  • Bring the marinade liquid to a boil and remove from the heat.
  • Add the chicken into the marinade liquid, cover with a lid, and let it cool down before moving it to the fridge (marinate for half a day or overnight).

After the marinating is done, place the chicken on an oven tray, heat up the oven to 400 degree F, and roast it for 30-40 minutes (until it reaches 165 degrees F). Once the chicken is cooked, let it cool down, and shred it using a fork. Remove the bones.

While the chicken is roasting, prepare the chili pepper mixture:

  • Chop in food processor: bell pepper, Thai (Bird’s eye) peppers, shallots, and garlic.
  • Heat up a medium pan and add vegetable oil (over medium heat)
  • Add the pepper, shallot, and garlic mixture into the pan and let it cook for 6-8 minutes or until the moisture evaporates.
  • Remove from the heat.
  • Add and mix the shredded chicken

Shredded chicken mixed in chili peppers

Serve with jasmine rice and a side of stir-fried cabbage with green onions. Why cabbage? I think cabbage is naturally sweet therefore a great neutralizer for my spicy chicken. I chop up 1-2 garlic, 2 green onions, ½ of cabbage. I cook the garlic and green onions with a little bit of vegetable oil and add the chopped cabbage. I add a little bit of water to help the cabbage cook faster, sprinkle a little bit of salt, cover the pan with a lid, and let it cook for 5 minutes or until the vegetable wilt. Remove excess water before serving. (Optional: scrambled eggs make a nice addition to the cabbage dish too.)

Stir-fry cabbage by Harini

Hope you like it!

Have a great week, everyone. Thanks for reading.

Green Pea Salad Over Broiled Halibut

Green pea salad by HR

People say we eat with our eyes. There might be some truth to that statement. I like this warm green pea salad recipe, another creation of Giada De Laurentiis, not only for its taste but also for its beautiful colors.

I must admit that I never really thought much of green pea before, let alone turning it into something appetizing. To me it was just some complementary vegetable used in a soup or in fried rice or just served (sadly and quietly) steamed as a side of something else better and tastier. And Jeff confirmed. He said he didn’t really care for green pea until he tried this salad. In this recipe, the vegetable gets a special attention enough to transform its plain being into a flavorful and visually appealing dish. Sometimes it really does depend on how we cook things, doesn’t it?

Green peas salad on broiled halibut by HR

In Giada’s recipe, the salad is served over baked halibut fillets. As usual, I did a few things differently. First, I used regular green pea instead of petite pea. Second, I made the salad a little bit garlicky and of course spicy by adding Serrano peppers ;). Third, since I prefer to have my fish crispy on the outer part and flaky inside, I broiled the halibut instead of baking it. Lastly, the recipe called for fresh mint and thyme, which I didn’t have this second time I made it so I went without.

The result? Sweet but yet spicy with a hint of lemon, nicely seasoned, and surprisingly filling salad. A perfect companion to the flavorful, lemony, and flaky broiled fish. The combination makes a great dinner menu. I added boiled potatoes drizzled with olive oil and sprinkled with salt and pepper as a side but I really didn’t need to. The fish and salad were quite filling by themselves.

Here’s my adapted version to serve two people:

Salad ingredient list:

  • 1 small bag of frozen peas (thawed)
  • 4 garlic (chopped)
  • 3 shallots (thin sliced)
  • 1 red bell pepper (sliced)
  • 3 table spoons of extra virgin olive oil
  • 2 Serrano peppers (you could also use other bigger peppers like jalapeno, hot fingers, cayenne, etc.)
  • Lemon zest from 1 lemon

Broiled halibut ingredient list:

  • 2 halibut fillets (enough for two people)
  • Lemon juice from 2 lemons
  • 3 garlic (chopped)
  • 1/4 extra virgin olive oil
  • Salt and black pepper

Steps:

  • As suggested in the original recipe: I mixed the lemon juice, chopped garlic, olive oil, salt and pepper in a bowl. Then I added the halibut fillets in the bowl, covered it with a plastic wrap, and let the fillets marinate for about 30 minutes in the fridge.
  • Then I heated up a medium pan and added: olive oil, garlic, shallots, and bell pepper to cook for about 6 minutes until they became soft and translucent. Once they were cooked, I turned off the heat, and added the thawed peas, salt, pepper, and lemon zest. Mixed all of them together nicely and set aside.
  • After the 30 minutes marinating time was up, I placed the halibut fillets on an oven tray (sprayed with olive oil), and broiled them for 10-13 minutes (no turning) or until they had these golden color around the edges. I also made sure that there was about 6 inches (about 15 cm) distance between the broiler and the tray to avoid charring.
  • I served the fillets and topped them with the green pea salad.

Green peas salad on top of broiled halibut by HR

Thanks for coming and have a great day!

Original Recipe: Roasted Halibut with Pea and Mint Salad, (De Laurentiis, Giada. Giada at Home. Clarkson Potter, 2010. Pg. 134)

Online version: Roasted Halibut with Pea and Mint Salad

Sugar and Bourbon Steak

Steak night by HR

Craving for a good steak for dinner tonight? I recently tried this great and easy recipe: Sugar Steak with Bourbon from Amanda  (Amanda & Merrill) at Food52.

Steak fiesta by HR

The recipe called for bourbon as part of the steak marinade. I know. You’re probably thinking about the strong aroma of that potent liquor. No worries. Once the steak is cooked you’d only end up with a tender, juicy, sweet, and savory steak sans the bourbon scent.

I adjusted the recipe slightly to serve dinner for two instead of for three to four people.

Ingredients:

  • I went with 3/4 pound of rib eye (instead of flank steak as the recipe suggested)
  • Two tablespoon of light brown sugar
  • Three tablespoon of bourbon
  • I used a pinch of cayenne pepper and chili pepper for an extra kick 😉 (instead of red pepper flakes)
  • Kosher salt

Here’s how I did mine:

As suggested by the recipe, I mixed the bourbon, sugar, cayenne pepper, chili pepper, and salt in a bowl and rubbed it on the steak. I transferred the steak and its marinade into a ziplock bag and let it sit in the fridge for two hours. Then I broiled it for about 7—8 minutes on each side until the temperature reached 150 degrees Fahrenheit for medium well (instead of medium rare). I followed Amanda’s suggestion for the 4—6 inches tray distance from the broiler.

I served the steak with sweet corn-pickled sweet and spicy pepper-roasted artichoke salad, slices of heirloom tomato drizzled in olive oil and balsamic vinegar, and celery root potato puree. What a fantastic dinner!

Buon appetito and thanks for stopping by.

Cooking inspiration for this entry came from:

Sugar Steak with Bourbon by Amanda (Amanda & Merrill) at Food52

Celery Root Potato Puree by Anne Burrell at Food Network

Fried Banana

Fried banana by HR

Fried banana by HR

Fried banana (in Bahasa Indonesia: pisang goreng), a classic Indonesian snack, comes in many versions. From the very gourmet at trendy restaurants, to the ones sold in bakeries, to the everyday version sold on the streets stacked up against food vendors cart’s glass window, the snack could easily be everyone’s favorite. It is sweet, simple, and straightforward. Pure comfort. With plenty of banana varieties (sweet ones, not so sweet ones, small ones, big ones, green, yellow, reddish-brown and names like pisang raja, pisang tanduk, etc) in this country, it only makes sense to turn them into delightful little bites.

One of my first trials in making fried banana was back in college days with a couple of friends. The three of us stood in my friend’s kitchen following my other friend’s mom’s recipe. He actually called his mom in Jakarta to get the recipe. We were serious about making this snack that night :).

Years have gone by since that day. The way I do fried banana might have evolved too. But the basic method I learned with my buddies more than a decade ago stuck with me.

Here’s the ingredient list for my version:

  • 5-6 bananas (I get the yellow ones with a little hint of green on the skin and on the crown part. They need to be on the  firm side so they won’t get mushy when fried.)
  • 1 cup of all-purpose flour
  • ½ cup of water
  • 3 tablespoon of fine sugar
  • 3 tablespoon of honey
  • 1 egg
  • ½ teaspoon of salt
  • Vegetable oil

Steps:

  • Heat up a large pan (over medium heat). Fill it with 1 or 1 ½ cup of vegetable oil (depending on how big the pan is.)
  • In a big bowl, mix flour, sugar, honey, egg, and salt. Add water to the mixture until it turns into nice and thick liquid batter.
  • Peel the bananas and cut them up into round pieces
  • Add bananas into the batter and make sure that they are all nicely coated

Banana batter HR

  • Spoon three to four pieces of bananas together (making them into clusters) into the hot oil. You could probably fry three or four clusters at the same time in the pan. Make sure that ¾ of the banana clusters are submerged in the oil. Fry each side for about 2 minutes or until it turns golden brown. Flip and fry the other side. Reduce the heat if the bananas brown too quickly.

Frying bananas HR

  • Remove banana clusters from hot oil using food strainer to drain excess oil
  • Let the bananas cool down for 5 minutes on a serving plate layered with paper towel
  • Watch them disappear quickly 🙂

Thanks for stopping by.

Have a great week ahead!

Spaghetti ala Puttanesca

Revised by author on 12/30/2013

Spaghetti ala Puttanesca
Spicy and garlicky, infused with anchovies! My kind of spaghetti…

Spaghetti ala Puttanesca

Spaghetti ala Puttanesca

Recently I stumbled upon a description of this dish in a book, called Belong to Me by Marisa de los Santos, that I checked out from the library on a whim. (Yes, though I have an Amazon Prime and a tablet, I still check out books from public library. I also still prefer books than e-books.) Anyway, one of the characters in this novel ( a book that has nothing to do with cooking by the way) described and raved about the dish in such a beautiful way that it made me hungry. Immediately! And that name, Spaghetti ala Puttanesca, the Whore’s Style Spaghetti? Wild! How could I resist the urge to try a dish with such a scandalous title?

In no time, I found tons of recipes for the dish online. I made mine using Nigella Lawson’s. This recipe had me at jalapeño. Here’s my adapted version. I liked it even more with the following revisions!

  • I used 12 10 instead of eight marinated anchovies (usually come in a tin or a jar)
  • I used five fresh jalapeno peppers (chopped) instead of pickled and chili flakes
  • I chopped five fresh tomatoes (instead of mixing them with canned tomato sauce) two heirloom and mix them with a small can (8 oz) of tomato sauce (not dice tomatoes or tomato paste)
  • Two tablespoon of olive oil
  • Two tablespoon of capers (drained and rinsed)
  • Three tablespoon of (roughly) chopped black olives Forgot to buy black olives so I went without
  • Five garlic (chopped) Four
  • A handful of parsley (chopped)

(Serves 3-4 people)

Steps:

  • Boil the pasta. Add a little bit of salt and olive oil into the water. Follow the instruction on the packaging.
  • Mix anchovies, jalapeño peppers, and garlic in a food processor then cook it with olive oil on a heated medium pot for two or three minutes.
  • Add chopped tomatoes, capers, and tomato sauce into the pot. Stir to mix everything together and let it cook for 10-15 minutes.
  • Heat up a large pan, add olive oil, garlic, chopped tomatoes, and anchovies. Mix them well. Add jalapeno peppers, black olives, and capers. Cover the pan with a lid and let it cook for 10–15 minutes
  • Drain the pasta, mix with the sauce, and add parsley
  • Serve and eat up!

Another easy and delicious recipe to keep.

Thanks for reading. Hope your week is going well!

Sources of inspiration for this blog entry:

Marisa de los Santos’ Belong to Me (pg. 44)

Nigella Lawson’s recipe: Slut’s Spaghetti