Easy Dry-Rub Roasted Chicken

Inspired by the delicious main course at Chicken Hut in Chicago, I went on a quest to make my own flavorful and juicy chicken. Since I don’t have the proper grill that produces great char-broiled chicken like the hut does, I settle with oven roasting.

On this quest, I am also learning, from this one easy recipe, that a good dry-rub made of spices and herb make a big difference in the flavor of roasted chicken. Generosity in seasoning matters too.

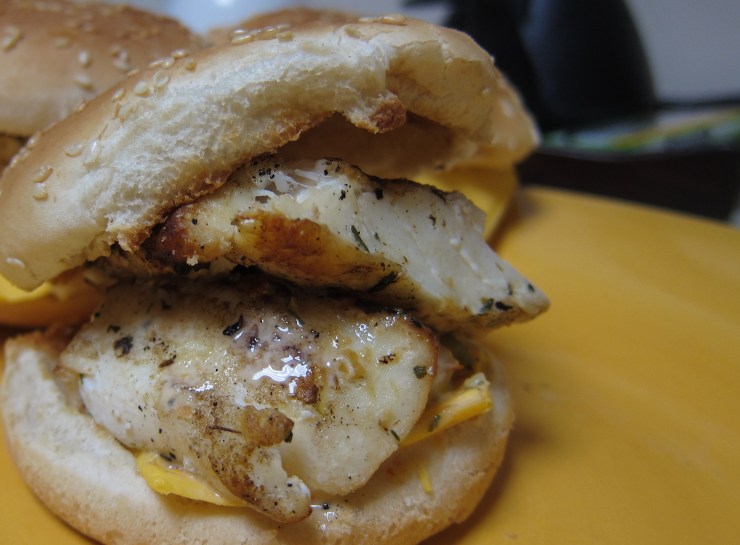
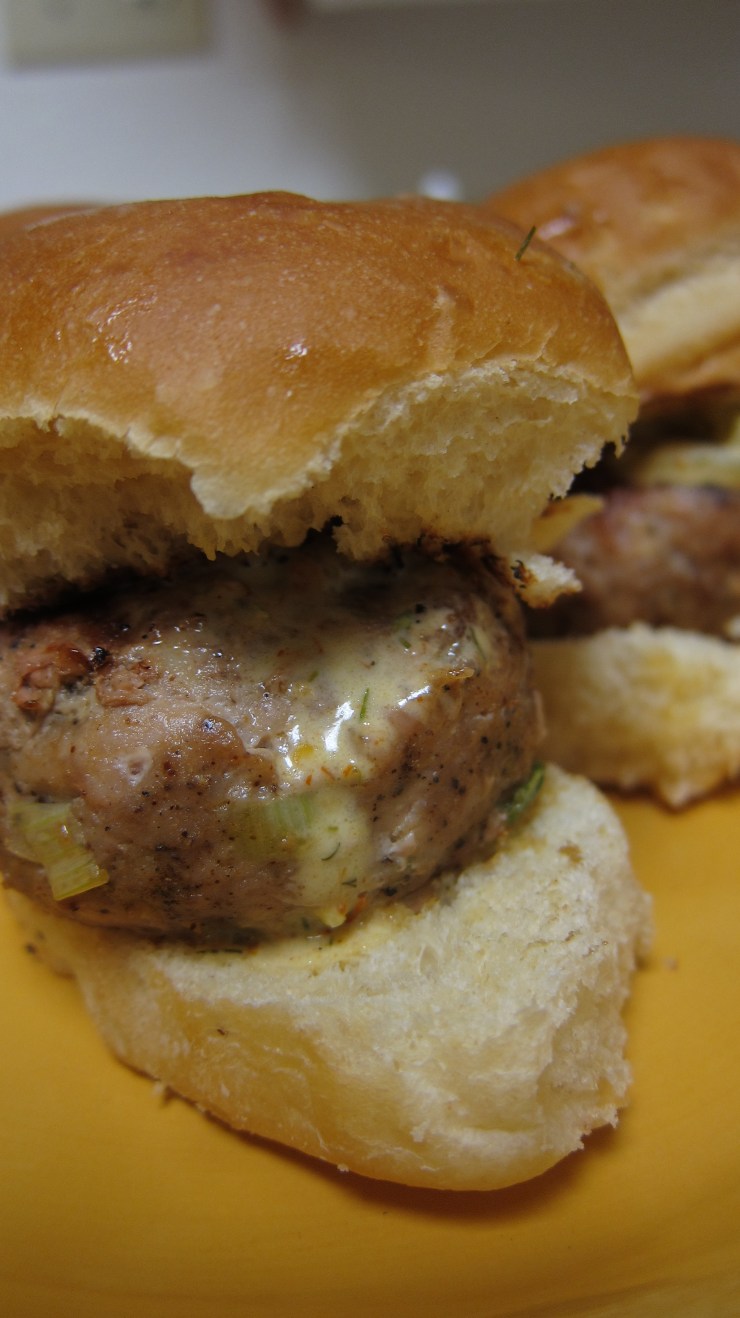
So here’s one result from the quest. This time, I went with herb-based dry rub for the chicken and a parsley salsa for dipping. The chicken came out of the oven with this beautiful golden color, crispy exterior, tender and juicy meat, and a wonderful fragrant.

For the roasted chicken, we will need:

  • A whole cut up chicken (that I cut up more into a total of 12 smaller pieces).
  • Salt
  • Pepper
  • 2 teaspoon of chili pepper powder
  • 2  teaspoon of ginger powder
  • 2  teaspoon of coriander powder
  • Lemon zest from 1 lemon
  • Olive oil
  • A pinch of dried rosemary (optional)
  • 1 thyme sprigs

For the salsa (dipping sauce):

  • 2 medium tomatoes (diced)
  • 2 Thai or cayenne peppers (chopped)
  • A handful of chopped parsley
  • Lemon juice from 1 lemon
  • ½ chopped sweet onion

Steps:

  • Preheat the oven to 400 degrees F.
  • Place the 12 pieces of chicken on a large oven tray.
  • Drizzle olive oil (lightly) on the chicken and then coat them evenly.
  • Season generously with salt, pepper, chili pepper powder, ginger, coriander, and lemon zest.
  • Sprinkle a pinch of dried rosemary and place the thyme sprigs on the chicken.
  • Make sure that both sides of the chicken are well coated with the seasonings.
  • Arrange so that the skin side faces up.
  • Roast for 40-45 minutes (until the chicken temperature reaches 162 degrees F).
  • Dump the juice, remove the sprigs, and let the chicken cool down for 5 minutes before serving.

Note: Next time I’ll try seasoning the chicken a day before I cook them (and leave them wrapped in the fridge).

For the salsa:

  • While the chicken is roasting, heat up a small pot over medium heat.
  • Place the tomatoes and let them cook for a few minutes until they become soft and juicy.
  • Add the lemon juice.
  • Mix the onions, peppers, and parsley.
  • Turn off the heat and serve on a bowl.

Serve with these red potatoes and baguettes:

(Click on the image for recipe)

Spicy Beef with Mint

I purchased two cookbooks this month to broaden my cooking horizon. My need for food inspirations is currently being met by Weeknights with Giada: Quick and Simple Recipes to Revamp Dinner and Giada at Home: Family Recipe from Italy and California. I simply love Giada‘s passion for food that transpires through her cooking style and quality. Though rooted in her Italian heritage, Giada’s recipes don’t shy away from being eclectic.

For Monday night dinner, I made Spicy Beef with Mint (also on Weeknights with Giada, pg. 159). This one-pot and Thai-influenced meal was so flavorful and easy to make. The sweet soy sauce, bell peppers, and shallots infused the tender thin slices of beef sirloin with sweetness. Then, the fish sauce, soy sauce, mint and basil leaves made this dish to be pleasantly tangy and aromatic. For an extra kick, Thai peppers and sriracha sauce did a good job in integrating successfully with the rest of the flavors. What an impressive flavor combination and balance!

I followed the ingredient list and steps from the original recipe. A few notes:

  • The recipe on the cookbook calls for sirloin steak (instead of flank as stated on this online recipe). I sliced the sirloin steak into ¼ inch cuts.
  • I used two bell peppers instead of one. One in red and one in yellow to create a nice color combination.
  • I also had some leftover asparagus in the fridge. So I sliced them up (threw out the very bottom white section) and added them into the pot with the basil and mint toward the end of cook time.
  • I happened to have these white basil leaves in the fridge. So that’s what I used instead of the Thai basil.
  • Best served with rice

Serve 4-6 people

Click here to see original recipe: Spicy Beef with Mint 

Beef Chorizo Sloppy Joe – Mini Burger Series

I had been wanting to try beef chorizo. Before this entry, I had only tasted a vegetarian version of chorizo, made from tempeh, and it was delicious. The wonderful smokey and peppery seasonings flavor had stayed in my food memory waiting to be experienced once again.  But how to prepare and enjoy beef chorizo was another question.

One Sunday morning I turned on the TV, flipped to Food Network, and saw an episode of the Sandwich King where the host, by chance, was making: Sloppy Jose with Chorizo, Charred Poblanos, and Avocado Crema. “Well, that’s it,” I thought, “My question received an answer.” 🙂 What a great coincidence. I accepted the show as a sign for me to continue the mini burger fiesta Jeff and I were having. This time it was with beef chorizo!

Here’s my adapted version of the Sandwich King’s recipe:

  • 1 Mexican beef chorizo (the packet I got was 10 oz or a bit more than a half a pound)
  • 1 cup store-bought refrigerated fresh salsa
  • Light shredded mozzarella
  • 2 red bell peppers (julienned)
  • Salt
  • Pepper
  • Cumin powder
  • 4-6 dinner rolls (halved)

Steps:

  • Fire up the grill.
  • Prepare an aluminum foil, fold along the edges to create barrier (so that the meat and salsa won’t run away from the foil while cooking), and poke a few holes in the middle of the foil using a fork (to create a way out for the fat and moisture). Place on the grill.
  • Unwrap the chorizo and place on an aluminum foil.
  • Let the meat cook for 15-20 minutes (I choose to cook it on a grill outside because it could get very smokey and very fragrant).
  • After it cooks for 15 minutes, add the salsa to the meat, and let it cook for another 10 minutes. Place on a plate.
  • Saute the julienned red bell peppers with a little bit of canola oil, salt, pepper, and cumin powder (until the peppers become soft).
  • Toast the buns
  • Sprinkle the cheese on the bottom bun, add a scoop of the chorizo salsa mix, put a couple of sliced peppers on top of the mix, and place the top bun.

Since these sloppy joes are already so flavorful and rich, I opt out of making the avocado crema.

(Makes 6 delicious mini sloppy joes)

Almond Blackberry Cookies – Venturing into the Baking World

I search for great flavor combinations in meals and also in sweets. I appreciate the creativity of balancing tastes, color, and texture in cooking and baking. Though I still feel more passionate about cooking and savory things, I say, “Why not?” to learning the art of baking. The way I see it: I already cook a lot, I might as well be able to make a few great sweets too :). So here’s my latest baking recipe trial that resulted in another favorite for Jeff and I.

Recently, I found this Peanut Butter Cookies with Blackberry Jam recipe from Giada De Laurentiis. The recipe is also included in her latest book, Weeknights with Giada (pg. 215).

I did a few little tweaks to this recipe to fit my preference:

  1. Instead of using ¾ cup of peanut butter, as suggested on the ingredient list, I used ¾ cup of ground raw almonds (that I ran through the food processor with 1/8 cup of olive oil). I blended the raw almonds and olive oil in a food processor until it became as grainy as possible. The almonds mixture did not have the same consistency as peanut butter of course, but I actually liked the chunky and grainy texture better.
  2. I also opted out of the step of rolling the dough in ¼ cup of sugar and went directly to form the doughs into little balls ready for the blackberry filling in the middle. (I also made the dough balls smaller than the ones in the recipe.)
  3. I used blackberry preserves, which I already had in my fridge, instead of jam.

Such delightful little cookies! I love the soft crunch, the subtle nutty almonds, and the sweet and tangy tastes of the blackberry preserves. I see them disappear quickly from our cookie box 🙂

Thin Sliced Steak – Yakiniku Style (Japanese Barbecue)

Eating out with my family make up a huge chunk of my childhood memory. Growing up, Japanese cuisine was big in Indonesia and was one of my family’s favorites. And as far as I could remember the cuisine had a lot more varieties than just the very popular sushi and bento boxes that we have been so accustomed to here these days. My favorite was Yakiniku.

In college, a friend of mine taught me how to make yakiniku at home. (Thanks again for it, Vick!) Each time I make it I am reminded of why I like the dish so much. Aside from the good memories it brings, this easy and savory meat dish is just so full of flavors! The sesame oil gives this warm and nutty aroma while the mixture of soy sauce, garlic, ginger, and cayenne pepper infuses the meat with such an exciting taste.

I like to cook my thin sliced steak on the grill outside. The meat tends to get very smoky when it is done inside, on a gridiron or on a portable gas stove at the table, just like how it is at yakiniku restaurants.

Here’s my super easy version of yakiniku.

Ingredients for the steak:

  • 1 1/2 pounds of thin sliced beef
  • 1 teaspoon of minced garlic
  • ¼ cup of low sodium soy sauce
  • ¼ cup of sesame oil
  • 1 teaspoon of ginger powder
  • 1 tablespoon of cayenne/chili powder

Ingredients for the sides (any of these will work fine):

  • Asparagus
  • Cucumber (peeled and sliced)
  • Lettuce

Steps:

  • Mix all of the ingredients for the steak in a resealable bag (or a bowl and then cover with a plastic wrap) and let it sit in the fridge overnight
  • Grill the meat over high heat. It won’t take long at all to cook since the beef are sliced very thin. So please don’t wander off too far from the grill
  • Remove the hardy bottom part of the asparagus
  • Drizzle asparagus with olive oil, salt, and pepper
  • Grill the asparagus for 4 minutes on each side
  • Serve the cucumber and lettuce on a separate plate as a side
  • Best served with rice

Serve 2 generously

Quinoa Stuffed Bell Pepper

Whoever invented stuffed vegetables was a creative genius. The compact goodness, with plentiful stuffing choices, makes a great meal. I have a list of stuffing and vegetables that I’d like to pair together. But this week the mood for a good cheesy, creamy,  either grain or pasta based, stuffing was heightened. So the search for the right ingredients began.

Curiosity led me to try quinoa for my vegetable stuffing base. I have heard about the grain a lot but have never tried it before. So I had to see what the excitement was all about. I grabbed a small bag of quinoa from the market and learned from the back of it that the grain makes a great substitute for rice and couscous. Right there and then, my cooking planning process began. I stood in the produce aisle, totally switched off from my surrounding, meditating on my next steps. An image of stuffed red bell peppers entered my mind. Next I imagined mixing the cooked quinoa with unsalted butter, light shredded mozzarella, halved grape tomatoes, onions, and a little bit of chop parsley. Then I visualized stuffing the mixture of quinoa into the bell peppers and liking the end result. Here’s the product of my food meditation 🙂

The real cooking process was as easy as I had pictured it in my mind. And even better, the result was as tasty as I had hoped for. Quinoa’s subtle nutty flavor and soft crunchy texture pair well with the sweet  and tender red bell peppers and tomatoes and with the savory cheese. I imagine the grain would be great in different styles of cooking too. Ideas already pop up in my head for the next quinoa-based meal. I’ll be sure to write them down and give them a try. More to come later!

Ingredients:

  • 1 cup of quinoa
  • 2 cups of chicken stock
  • A handful of chopped parsley
  • ¼ chopped onions
  • A handful of halved grape tomatoes
  • 1 tablespoon of unsalted butter
  • 2 handful of light shredded mozzarella
  • 3 red bell peppers (remove the top and the seeds)
  • Salt
  • Pepper
  • Cayenne pepper (optional)

Steps:

  • Preheat oven to 350 degrees
  • In a small pot, cook 1 cup of quinoa with 2 cups of chicken stock. Stir and bring to boil. Close with a lid and let cook for 20 minutes (I followed the cooking instruction on the bag).
  • After 20 minutes, turn the heat off, add butter and stir until it melts
  • Add the shredded mozzarella
  • Add the grape tomatoes, onions, parsley, salt, and pepper into the mixture and mix well
  • Scoop the mixture and fill up the bell peppers
  • Top with a little bit more of mozzarella
  • Using your fingers, coat the outer part of the pepper with a little bit of olive oil
  • Place the stuffed bell peppers on a baking dish, add a little water on the bottom of the dish (like two tablespoon of water). Bake for 20-25 minutes or until the bell peppers become a bit wrinkly and soft.

Sweet Peppers with Artichoke Hearts Salad – A Side to My Mini Burgers

I’m finding more things to like: roasted sweet peppers. They make such a wonderful side dish. These pretty and colorful little things complement savory dish very well. Recently I mixed them with artichoke hearts, another fave, and served alongside my turkey and halibut mini burgers. The result? The three make a  superb combination, light but substantial. Definitely a great springtime dinner menu.

Inspired by a fellow blogger’s post at We Call Him “Yes! Chef!”

Here’s what we will need:

  • A bunch of sweet peppers (mini or regular ones are fine – I happened to have the mini ones for at the time)
  • A jar of marinated artichoke hearts (halved)
  • A tablespoon of olive oil

Steps (while my turkey patties and halibut fillets are grilling outside):

  • Drizzle olive oil on the peppers and mix with both hands. Place on a baking sheet
  • On a separate baking sheet, place the halved artichoke hearts
  • Set the oven to broil
  • Place both peppers and artichoke hearts in the oven for about 5 minutes or until the peppers’ skin turn darker
  • Take both out of the oven
  • Place the peppers in a bowl and cover with a plastic wrap to steam. Then the skin can come off easily
  • Chop the peppers and mix with artichoke hearts
  • Serve on the side of these guys:

Mini Burger Series – Halibut Burger

Yesterday, I posted an article about my turkey mini burger with a mention of halibut mini burgers that I also did. Though Jeff and I love a good meaty and juicy beef burgers, we also enjoy other kinds. We take pleasure in having food variety. It definitely makes mealtime a lot more exciting. So here’s another alternative to the regular beef burger.

Spring has returned to earth. It definitely came back a lot earlier this year. The warmer air and bright sun create a perfect strolling weather to check out blossoms all around. Spring also means the start of grilling season for us. I love grilling outside. (Well, actually, Jeff does a lot of the grilling in our little patio 🙂 ) Recently, I made this delicious, light but yet filling, halibut mini burgers along with my turkey mini burgers. Halibut is definitely one of my favorite white fish. I enjoy its mild flavor and its substantial but fluffy texture. A perfect selection for my mini burger.

Ingredients:

  • 2 large fillets of halibut (divide into 4 servings)
  • Olive oil to coat the fillets
  • Salt
  • Pepper
  • A sprinkle of ginger powder
  • A sprinkle of dried rosemary
  • Lemon juice (from half a lemon)

We will also need 4 burger buns or dinner rolls

Sauce (inspired by Rachael Ray’s)

  • 2 tablespoon of mayonnaise
  • 2 tablespoon of mustard
  • 1 teaspoon of dill
  • 1 teaspoon of chopped pickle
  • Lemon juice (from half of a lemon)
  • 1 teaspoon of Sriracha hot sauce

Steps:

  • Mix the fish with all ingredients, cover with plastic wrap, and let marinate in the fridge for at least half an hour.
  • In a small bowl, mix mayo, mustard, dill, chopped pickle, lemon juice, and Sriracha for the sauce. Refrigerate until the fish is ready.
  • Spray the grill with olive oil so that the fish won’t stick
  • Grill the fish for 5 minutes on each side
  • Grill the buns/rolls for a minute or two
  • Spread the sauce on the top and bottom of the buns/rolls and drizzle a little on the fillet. Add cheese if you prefer. Stack up the burger.
  • Serve with roasted sweet peppers with artichoke hearts salad

Mini Burger Series – Turkey Burger with Spicy Mayonnaise Sauce

I think food variety is key to exciting meals. So I try to expand our home-cooking menus. Thankfully, Jeff and I are pretty open to enjoying various types of food. It definitely makes cooking and eating to be a lot more fun.

One day the mood for burgers happened to strike me. Jeff and I both love a good burger. This time though, instead of going to our usual burger joint that night, I decided to make the burger. We just had a beef dish the day before so I thought of other meat alternatives to make a delicious burger. Turkey immediately came to mind followed by a meaty fish, like halibut. Couldn’t choose which one to make, I decided to do two mini burgers: turkey and halibut. I added roasted sweet peppers with artichoke hearts as the side salad. (Next posts: Halibut Burger and Roasted Sweet Peppers with Artichoke Hearts)

Ingredients for Turkey Burger:

  • 1 ½ pounds of lean ground turkey
  • Ginger powder
  • Chili powder
  • A teaspoon of minced garlic
  • Salt
  • Pepper
  • Green onions (chopped the white area and discard the green part)

We will also need:

  • 7 burger buns or dinner rolls
  • 7 slices of cheddar cheese

Ingredients for the sauce:

  • 2 tablespoon of mayonnaise
  • 1 tablespoon of dijon mustard
  • A sprinkle of dill leaves
  • 1 teaspoon of Sriracha hot sauce

Steps:

  • In a big bowl, mix all of the ingredients for the burger and make five to seven patties from the mixture (depending on how big you want the patties to be)
  • In a smaller bowl, mix the ingredients for the sauce. Cover with a plastic wrap and keep in the refrigerator until the burgers are ready to serve.
  • Grill the patties for seven minutes on each side.
  • Place the cheese on top of the patties when they’re almost done.
  • Warm up the buns or rolls on the grill for a minute or two.
  • Spread the sauce on the top and the bottom of the buns, drizzle a little on the patties, and stack the burgers.
  • Serve with roasted sweet peppers and artichoke hearts salad.